
Amazon Associates Disclosure We are a participant in the Amazon Services LLC Associates Program, an affiliate advertising program designed to provide a means for us to earn fees by linking to Amazon.com and affiliated sites.
Recipe for Chocolate Wedding Cake
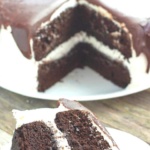
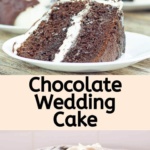
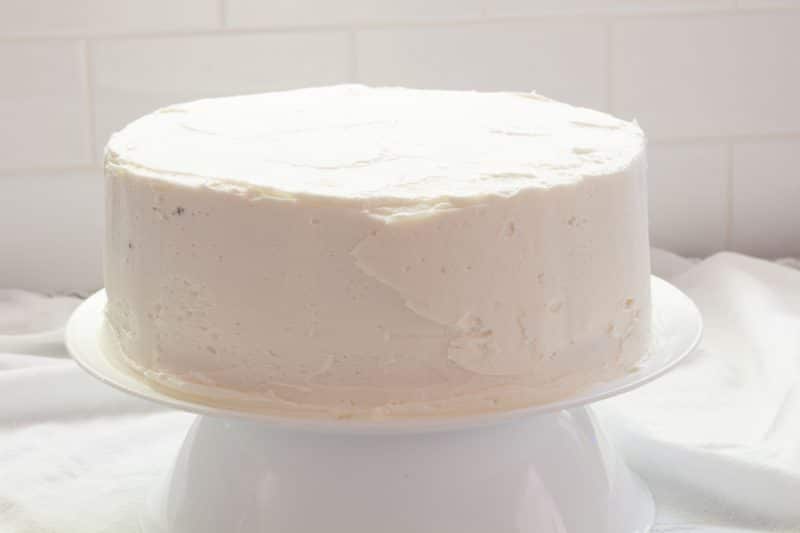
Chocolate Wedding Cake with a deep chocolate flavor is great for stacking and serving in thin slices. Suitable for weddings, grooms’ cakes, birthdays, and showers. Perfect for layered cakes but just as easily served from a 9 X 13 cake pan for a casual dessert.

This recipe was developed because of the high number of requests for a chocolate version of our White Wedding Cake Recipe.
We have always thought of chocolate as a groom’s cake, but as time marches forward, wedding cake flavors have changed.
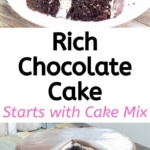
Just like the white version, our chocolate celebration cake starts with a cake mix, but this time, it is a chocolate fudge mix.
There are more differences between the white wedding cake recipe and the chocolate wedding cake recipe than just swapping out the flavor of the box mix.
The chocolate version calls for cold coffee rather than water for the main liquid.
It is not necessary, but coffee brings out the chocolate flavor in baked goods.
Coffee extract and/or chocolate extract could be used, but I normally have coffee leftover in a morning that I just set aside until I am ready to make the cake. 1 teaspoon total of an extract should be plenty.
Espresso powder mixed with 1 1/3 cups of hot water is also an acceptable substitution for the 1 1/3 cups of cold coffee called for in the recipe. 1 teaspoon is enough for this recipe.
Make sure you allow the espresso mixture to come to room temperature before adding to the cake batter.
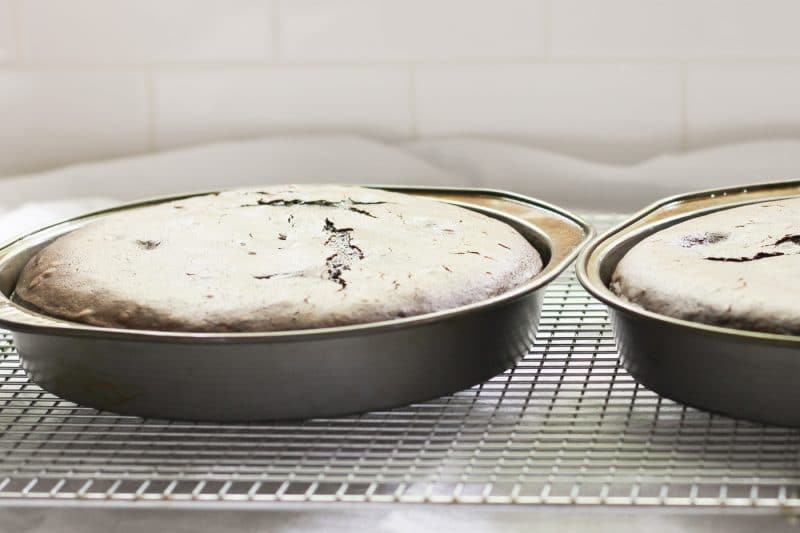
See the slight doming while the cake is still hot.
I don’t add any vanilla extract to my chocolate wedding cake because I cannot tell a difference in this one.
Some people will tell you that it makes a huge difference, so if you are in this camp, feel free to add a teaspoon or two to your batter.
Now, I do use vanilla extract in the white buttercream that I use with this recipe.
It is virtually the same buttercream icing recipe used in the white version, except there is no butter or almond extract.
The addition of dark cocoa powder will also enhance the chocolate flavor.
I replace 1/4 cup of the flour from our original recipe with 1/4 cup of Hershey’s Special Dark Cocoa powder.
Regular cocoa can be used, but the chocolate flavor will not be as rich.
The cake mix I prefer for the chocolate wedding cake is Duncan Hines Dark Chocolate Fudge.
It is usually available at the mega-mart, but like all my favorite brands of cake mixes, it can run low on stock on occasion.
Betty Crocker’s Triple Chocolate Fudge mix can also be used, but since it has pudding in the mix, it may take a bit longer to cook.
Humidity will play a factor in baking this cake.
Start checking with a toothpick inserted into the center of the cake at 35 minutes.
If the toothpick is super gooey, check again in 10 minutes.
If it is just a little wet, check in another 5 minutes.
When the toothpick comes back clean, take it out of the oven.
This one may also be slightly sticky on the top. It’s all good, you are going to cover it with frosting anyway.

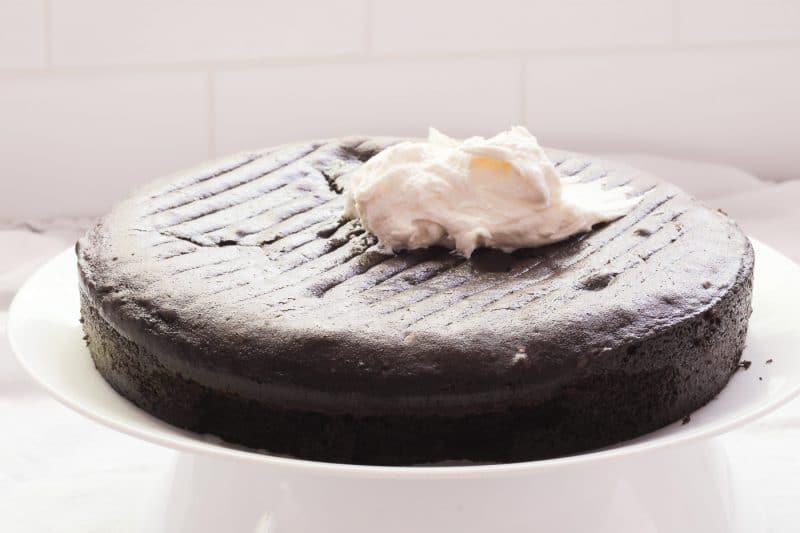
Run a knife around the edge of the pan before removing to avoid sticking like this.
Fill in those areas with extra frosting.
The icing portion of this recipe will make a ton of icing.
It is enough icing to frost a 2 layer cake with enough to fill the middle.
If making this in a 9 X 13 cake pan, scale that portion of the recipe down if desired.
The extra icing can be used to ice over the cut portion of the cake to keep the cake from drying out on the edges.
I put the leftover icing between graham crackers and allow them to soften and call them beginner cookies.
Makes a nice lunchbox treat or afterschool snack.
Another option is to freeze the leftover icing for use on another day.
To freeze leftover icing put it into a freezer ziptop bag, flatten slightly, and place in the freezer.
Frozen buttercream icing will last up to 2 months in the freezer.
To use the frozen buttercream icing at a later time, lay the baggie on a counter and allow to come back to room temperature.
It may need to be whipped up with a mixer, but an electric hand mixer can be used this time.
The amounts provided in the recipe are the smallest batch I make in my kitchen.
Anything amount smaller than the one I have listed and my stand mixer paddles don’t have enough ingredients to work with.
I also figure if I am breaking out the heavy stand mixer anyway, I might as well make the extra icing to have on hand.
Sometimes, I have enough icing in the freezer that I am able to thaw 2 batches of leftover icing and ice an entire 9 X 13 cake.
I have made this one in 2 9-inch, 2-inch tall, cake pans.
The best way to keep your layers from doming to much is to use cake strips.
If you do not have cake strips because you managed to lose them in a recent move, fear not, you can use long strips of aluminum foil, filled with damp paper towels!

Use enough foil to wrap completely around the sides of the pan. Use a length of paper towels a few inches shorter than the foil.
Dampened the paper towels, wring out excess water, straighten them out, and fold it into thirds lengthwise.

Encase the paper towels completely in aluminum foil.
My folding skills have a little to be desired and I sometimes find myself with extra homemade cake strips hanging over the bottom of the pan.

Don’t panic, just place the cake pan on a cookie sheet and gently press down until the cake pan is sitting level.
Fill the cake pans while they are sitting on the cookie sheet and place them into the oven while on the cookie sheet.

Don’t forget to add a layer of parchment paper to the bottom of the cake pans!

Another option is to use a cake leveler to cut off the tops of the domes after baking without heat strips.
I have done all of the above.
I have even done nothing. Simply put both domed ends towards the middle and pack it in with icing.
I don’t recommend doing this for any formal event, but it is quite acceptable for an informal home cake.
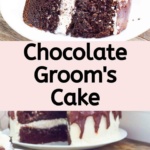
If serving this as a groom’s cake, I would suggest using a chocolate fudge frosting or a dark chocolate ganache spread over the top of white icing. allowing the ganache to drip over the sides.

To make a pourable ganache that will not melt your icing; heat 1 cup of heavy cream mixed with 2 tablespoons of corn syrup over medium-low heat until it begins to give off a little bit of steam.
While that is heating up, place 2 1/2 cups of chopped chocolate or chocolate chips in a medium-sized bowl and set aside
When the cream is ready, remove it from the heat and pour over the chocolate. Stir until every bit of chocolate is melted. My ganache was too thick and cooled off too fast for this photoshoot.
Stir the ganache occasionally until it cools slightly and starts to thicken. You want it pourable but not so hot that it instantly melts your icing.

Any flavor of chocolate can be used. I have even used milk chocolate chips.
As with our white wedding cake recipe, I urge you to do several practice-runs at the cake and icing recipes well before an important event.
You really want to make sure you have your baking times down for your oven and cake pan sizes.
You also want to make sure that you have the icing recipe down for the texture and consistency you are looking for.
That photo is somewhere between a Pinterest fail and a novice cake decorator. I’ll leave it up to you to decide which one it is.
Side note: thick ganache may be ugly, but it was delicious!
With ganache, sometimes it takes a bit of practice to get that timed just right.
You may also like a thinner ganache so try using less chocolate until you find the exact consistency you like.
Temperature also makes a difference.
You will also want to practice a bit to get just the perfect drip size you wanted. Some folks like it all the way to the bottom, others only like a half drip.
Clearly, mine cooled way too fast to have anything closely resembling a drip!
MORE CAKE RECIPES YOU’LL WANT TO TRY!

FOLLOW US ON SOCIAL MEDIA AND SHARE THIS RECIPE
SIGN UP FOR NOTIFICATIONS AND NEVER MISS AN UPDATE

Chocolate Wedding Cake
Ingredients
Chocolate Fudge Cake
- 1 box chocolate fudge cake mix
- 3/4 cup flour
- 1/4 cup dark special cocoa
- 1 cup sugar
- 1 1/3 cup strong brewed coffee room temperature
- 1 cup Greek yogurt, plain can substitute with sour cream
- 3 large eggs
- 2 tablespoons oil
White Buttercream Icing
- 1 cup Butter softened
- 1 cup shortening
- 2 pounds Powdered Sugar about 7 1/2 cups
- 1/3 cup of room temperature milk more may be needed
- 1 tablespoon vanilla extract
- 1/4 teaspoon salt
Instructions
- Chocolate Fudge Cake
- Preheat oven to 325°F.
- Prepare a 9 X 13 baking pan by spraying with baking spray. Set aside.
- Place cake mix, flour, cocoa, and sugar into the bowl of a stand mixer. Mix just until combined.
- Add coffee, yogurt, eggs, and oil. Add vanilla extract now if using.
- Mix on low speed until combined.
- Turn mixer to medium speed and mix for 2 minutes.
- Pour into prepared pan and place in preheated 325°F oven.
- Set timer for 35 minutes. If you begin to smell the cake before the timer goes off, check the cake by sticking a toothpick in the center. If it comes out clean or with just a few crumbs but no wet batter, the cake is done and it needs to be removed from the oven.
- Once the timer goes off, and you have not removed the cake already because it was done, check the cake for doneness by using the toothpick method.
- If the cake is not done after 35 minutes, continue cooking the cake and checking for doneness every 5 to 10 minutes, depending on how wet the toothpick was when testing the cake. This can take 45 to 50 minutes.
- When the cake is done, remove from oven and cool completely before frosting.
- White Buttercream Icing
- Place butter and shortening in the bowl of a stand mixer.
- Using the blade attachment, mix on medium-high for 5 minutes.
- Add powdered sugar 2 cups at a time and mix on slow until all sugar is incorporated.
- Mix milk, extracts, and salt in a small bowl.
- With the mixer turned off, add milk mixture to icing.
- Turn mixer to slow and mix until incorporated.
- Turn mixer to high and allow to run for 5 minutes.
- Test icing for consistency. If you want a thinner icing, add milk 1 tablespoon at a time and mix for 1 minute.
Notes
- If using this pan for an important event, please do a test run with this recipe and cake pan sizes you intend to use before the big event.
- Cake recipe can be doubled for larger pans, adjust the baking time.
- 36 cupcakes can be made with this recipe. Reduce baking time to 18 to 20 minutes.
- This cake needs to be supported if stacking greater than 2 layers high.
- Icing recipe will easily cover a 2 layer 8-inch cake, amounts can be halved if the cake is being served in a 9 X 13 pan.
- Consider using all solid shortening in the frosting for outdoor events or events where it will be warm.
- If using all solid shortening for the frosting add another 1/4 tsp salt.
- Cook time listed does not include the cooling time between baking and icing.
- You will get 6 1/2 cups to 7 cups of batter when using this recipe as stated.
- Can be made in smaller round pans for layering, adjust the baking time. 6″ – 25 to 30 minutes, 8″ – 45 to 60 minutes, 10″ – 65 to 75 minutes.
- 6″ pans hold about 3 cups of batter, 8′ pans hold about 5 cups of batter, 10″ pans hold around 8 cups of batter. You may need to double this recipe and make multiple batches for large cakes.
- Use a baking nail placed in the center of the cake for pans 10″ and larger.

Nutrition
Nutrition information is automatically calculated and may vary based on exact ingredients used. For accuracy, consult a registered dietitian or nutritionist.
Could this be turned into a red velvet stackable cake? I love both the chocolate and vanilla recipes!
Hi Katie!
I don’t know why it couldn’t be. I would start with the white cake recipe and substitute with a red velvet cake mix and omit the almond extract, I think those flavors might clash. Then I’d either use the white buttercream without almond extract (add extra vanilla), a cream cheese frosting, or an ermine (cooked frosting). We have one for cream cheese frosting included with our carrot cake recipe, and ermine frosting is included with our red velvet cake recipe.
Hope this helps!
For most of your cakes, you give instructions for making it as a layer cake and even cupcakes, but in this one, I’m not seeing that. What would the baking times be for both 8″ and 9″ round (layer) or cupcakes? Of course, it may be the same as for the white cake, but I thought I’d check before experimenting. Thanks!
Hi Sheryl!
You are so right and I apologize for that! I have added some adjusted baking times to this recipe card. Thanks for asking! I would never have realized I missed that.
Hi Beth,
I am planning to try this in the next couple of weeks. I live at about 6,000 feet elevation, and I’m wondering if you think I will have to adjust the cake portion of the recipe?
Thank you!
Joy
Hi Joy!
I’m not familiar with high altitude baking. I would take a test run and see what happens. During some research this morning, I discovered that sometimes a recipe is fine as it is, but when it isn’t, there different solutions depending on the effects. Wilton has a good resource .
If you do a trial run, I’d love to help you sort out any issues that may come up. Sorry I couldn’t be of more help this morning.
Excellent! I’ll give it a go and let you know how it turns out. Thank you!
Hi Joy!
I look forward to hearing your high altitude experience!
Will this recipe work in a sheet pan?
Hi Ruth!
I’ve never used a sheet pan any bigger than 9×13 for this recipe.
This recipe makes 6.5 to 7 cups of batter. A larger sheet pan or jelly roll pan needs 10 to 14 cups of batter depending on the size and height.
You’ll need to at least double the recipe. Fill your pan 1/2 to 2/3 full of batter.
The baking time will probably need to be increased to 40 to 45 minutes, but I’d check at 35 minutes.
Hope this helps!
Cheers!
I just used the white wedding cake recipe in a sheet pan to make wedding cake trifles at a wedding I just did. Worked perfectly. Plus I had to slice it thinner for layers and it held together amazingly, no crumbling. The brides mother tasted the wedding cake that I didn’t do and asked why she didn’t have me make it! They raved about the trifles!
Hi Becky!
I’m really happy it worked out for your trifles! That’s funny the bride’s mom liked your wedding cake dessert better than the actual wedding cake! Thanks for visiting again and for sharing your experience.
Cheers!
Picture shows 2 layer cake. I’m guessing two 8 inch round cake pans? Also I have never used yougurt. . I have used sour cream. I did not see the additional chocolate over the buttercream.
Hi Frances, it is just a pourable ganache. I have some directions for the one I use on occasion in the post itself. Hope this helps!
Can this recipe be used to make cupcakes?
Hi Samantha!
It can! You should reduce the baking time to 18 to 24 minutes, or until a toothpick inserted into the middle comes out clean. Hope this helps!
I made the cupcake version and they were awesome!
What kind of butter do you use for the buttercream?
Hi Nataly!
I use salted butter.
Cheers!
Can you use devils food instead of fudge recipe?
Hi Anna!
You can use any chocolate cake mix, it just won’t have the same deep chocolate flavor, but it will still be delicious!
Cheers!
Delicious! I used 6″ cake pans, filled them 2/3 of the way up with batter and even with my aluminum foil/paper towel collar, they had huge domes I had to cut off. Any recommendation on how to avoid that in the future? Should I only fill with batter halfway?
Thank you!
Alex
Hi Alex!
Thanks for visiting again and leaving a review! Sorry to hear you had huge domes. You could try using less batter and check your oven temperature, some ovens run hotter than the settings.
You can see in the process photos that my cakes are a little higher in the centers. I used two 9-inch round pans. I just flipped the cake layers over to cool so the cake is sitting on the dome, then I put the domed side in the middle of the cake and fill the gap with icing.
Hope this helps!
what can I use instead of eggs? allergic to them
Thanks!
Hi Tanya!
I have never made this cake without eggs so I can only offer suggestions. Aquafaba (the bean juice from canned chickpeas) is the latest vegan go-to for egg replacement in baked goods. You’ll need about 9 tablespoons. Beat the liquid a bit until it is thick, but not whipped.
You could try using 3/4 cup of applesauce as a replacement, it is suitable for many box cake mixes so I am going to guess that substitution also works well here.
Bob’s Red Mill makes a vegan egg replacer that could be used, but it may be hard to source while we are stuck at home.
Hope this helps!
Stay Safe!
Do you use self rising, plain or cake four in this chocolate?
Hi Dana!
Just plain all-purpose flour.
Cheers!
Can you make this cake in any Bundt cake pan?
Hi Holly!
You can make this in a bundt pan. I would coat the pan with solid shortening, followed by a light granulated sugar or almond flour coating, and turn the heat up to 350 Degrees F. Bake it until a wooden skewer or a butter knife is inserted into the center of the cake comes out clean or with no more than few crumbs. Start checking after 35 minutes, but this could take up to 50 minutes because a bundt pan is just deeper than a regular cake pan. We have a few more tips for baking with a bundt pan in our Pound Cake post for making sure you can get your cake out of the pan. https://peartreekitchen.com/rich-butter-pound-cake/
Cheers!
DO I have to use coffee? What would I need to substitute for the coffee?
Hi Kristy!
Coffee can be omitted. It is just used to enhance the chocolate flavor.
Cheers!