Amazon Associates Disclosure We are a participant in the Amazon Services LLC Associates Program, an affiliate advertising program designed to provide a means for us to earn fees by linking to Amazon.com and affiliated sites.
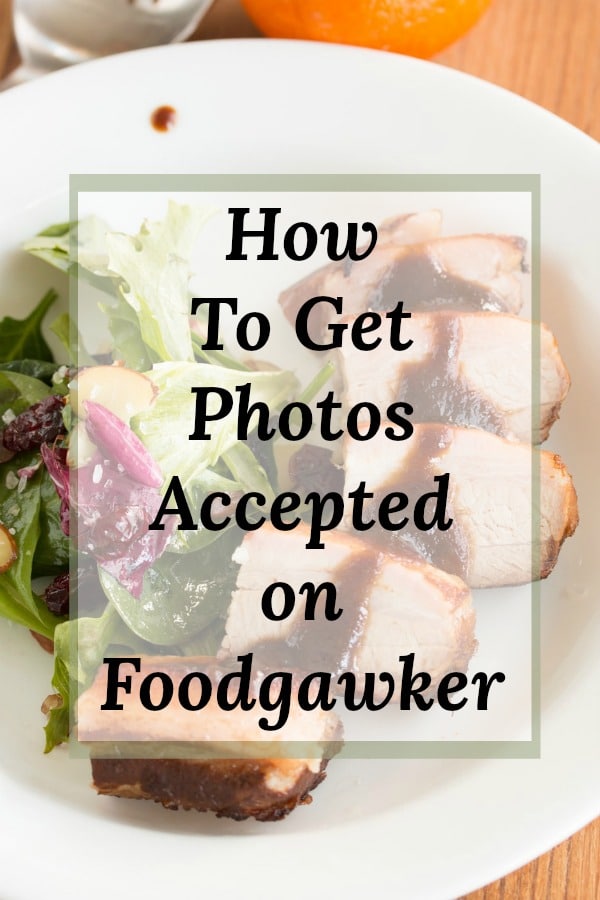
Getting Accepted on FoodGawker

First things first, no matter which kind of camera equipment, backdrops, or props you use, if you do not have good composition, lighting, and/or editing your photos are not likely to be picked up by FoodGawker.
I read it all the time in a food blogging Facebook group that it is hard to get a photo accepted by FoodGawker.
We are here to tell you that just isn’t true.
FoodGawker Rejection
Do we have photos that were not accepted by FoodGawker? Well, of course. It still happens on the rare occasion we submit photos.
We just had one a few months ago that was turned down. It was a “dull-unsharp image.”
It might have been, we didn’t think so, but we are not the curators and our opinion means diddly squat.
Eventually, we just submitted a different photo and it was accepted.
Do you see a huge difference? Neither do we, unless we turn a critical eye to our own work and then it is clearly apparent.
Looking at it now, I suspect my f/stop was a bit too low on the above photo and adjusted on the lower photo. I can’t be sure if that was the issue because I did not get much feedback.
It’s easy to believe that FoodGawker is part of some conspiracy to squash the hopes and dreams of a new food blogger. But that isn’t true either.
In the beginning, Ron had almost all of his photos accepted. Me, I had a much rockier start.
I was part of the FoodGawker hates me club!
To date, we have had 141 photos accepted. You can see our gallery of accepted photos here.
If I could change anything it would be that I would have admitted how little I actually knew about food photography.
I cringe when I look back at some of my early work. Even those that were accepted by FoodGawker.

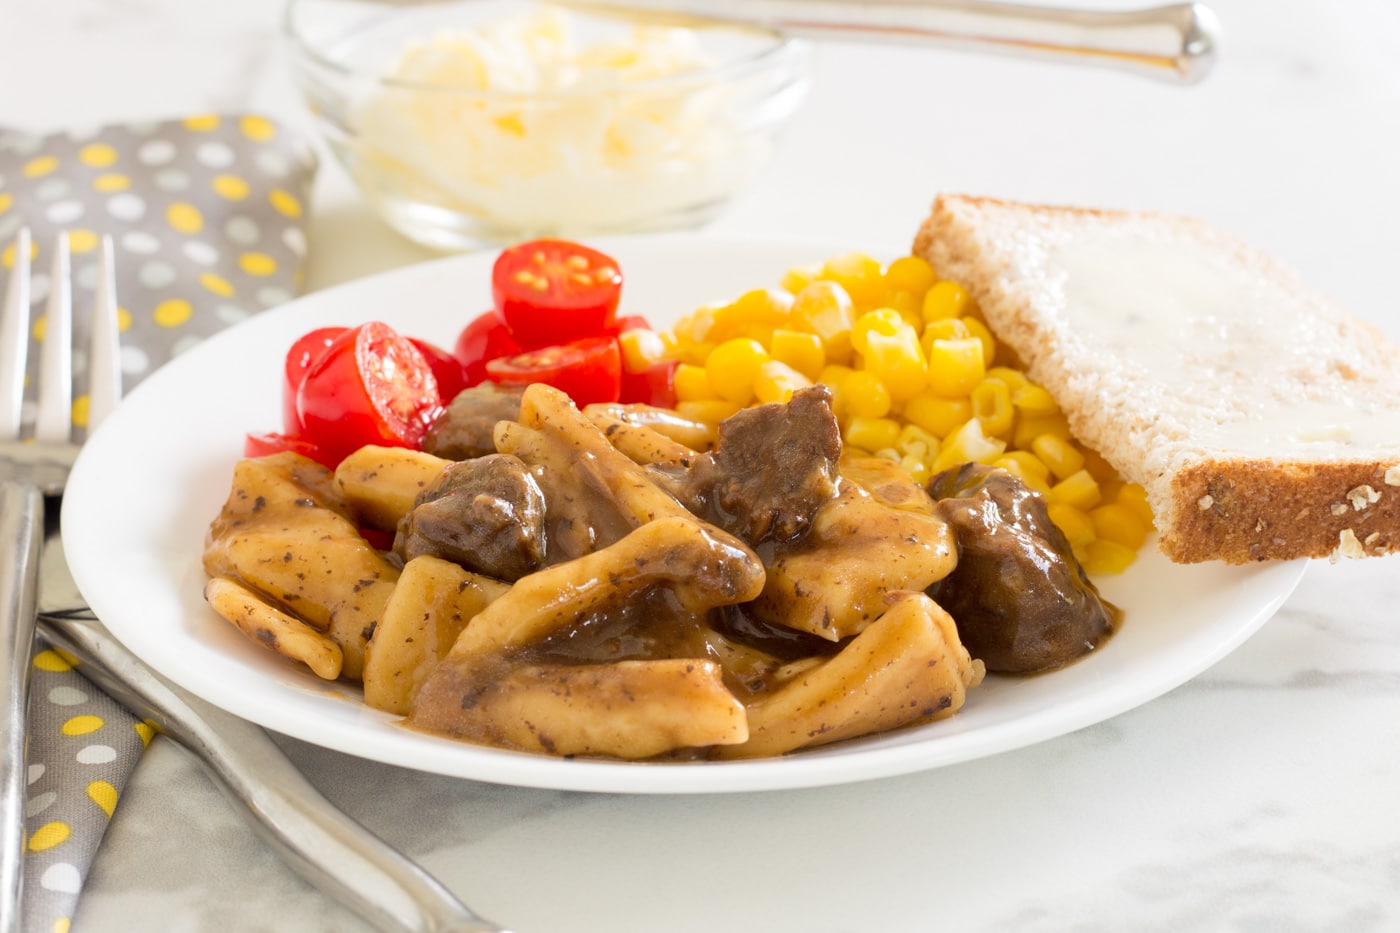
Beef with Homemade Egg Noodles is delicious, but it did not look so spectacular in this photo.
It’s got some nice colors, but the beef and noodles itself, aye caramba!
Frozen noodles would have made a nicer photo, but it would not be true to that recipe.
Above all, we are true to ourselves and our recipes. You will never find a recipe written by us that has not been made in one, or both, of our kitchens.
Unfortunately, I cannot retract my photos from FoodGawker or FoodYub.
Nearly two years later, the beef and noodles photo would not pass my initial review. It has hard shadows and the lighting looks artificial.
It was actually direct sunlight and unless I am trying to capture the look of sunlight through leaves I do not shoot in direct sunlight anymore.
FINALLY! Three years later I have a new Beef and Noodles photo! What a difference a bit of practice makes!
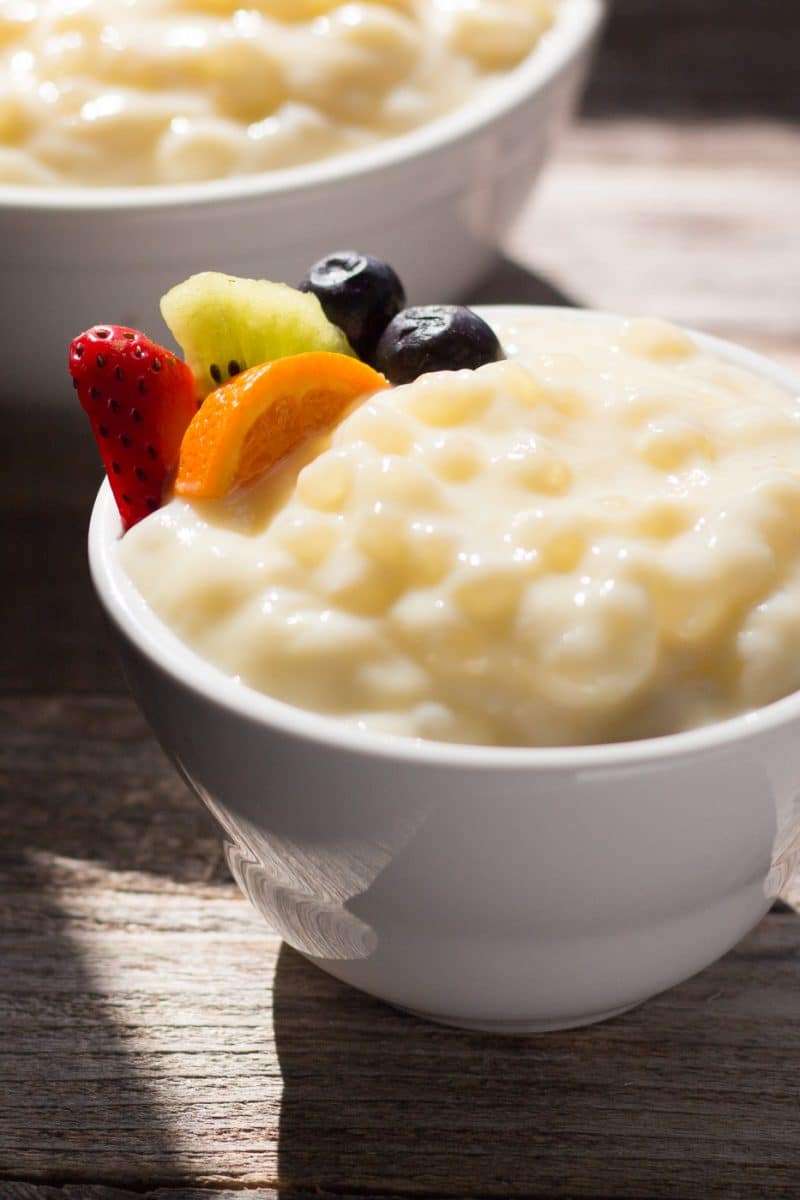
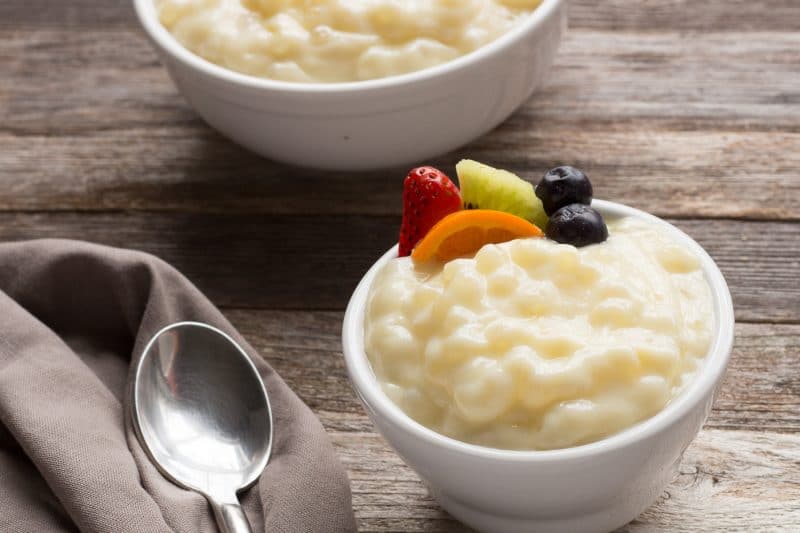
Large Pearl Tapioca Pudding was in direct sunlight, as a total accident. The sun came up and around in the middle of a photo shoot.
In this particular case, we both liked the look of that photo versus the one where it was pulled out of the sunlight.
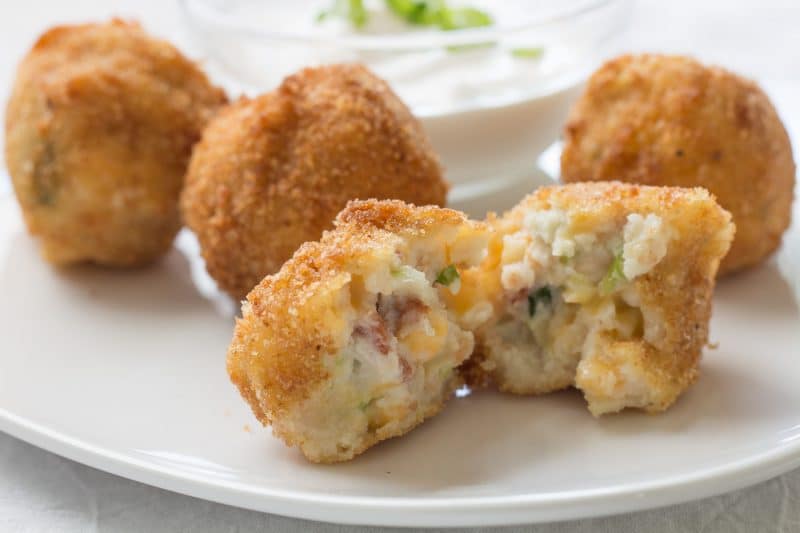
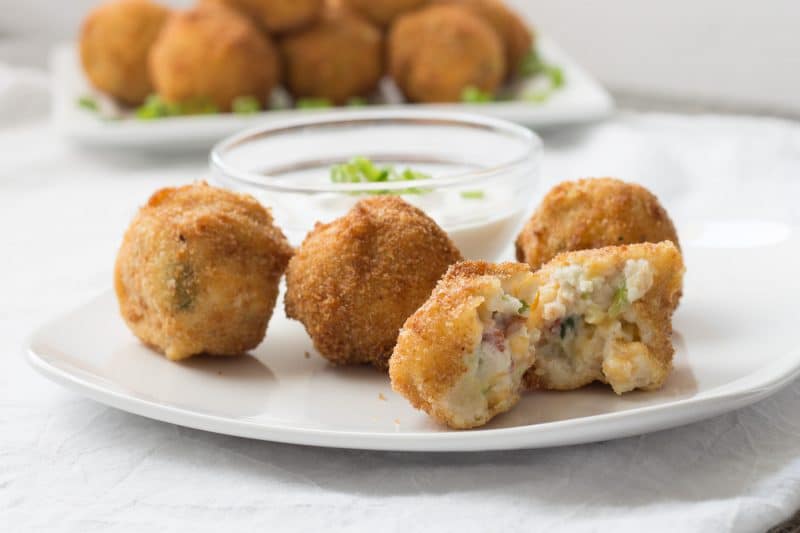
The following 2 photos show what a difference just 6 months can make with continued practice.
The advice here is to never give up. Keep taking lots of photos.
FoodGawker Traffic Referrals
The majority of our traffic does not come from FoodGawker. Not even on the days of photo acceptance with page 1 exposure. Yes, page 1 exposure does happen, although the number 1 spot has eluded us.
Our two most popular posts, have both been shared on social media over 100,000 times but were not accepted by FoodGawker.
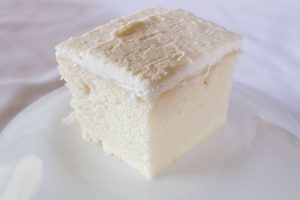
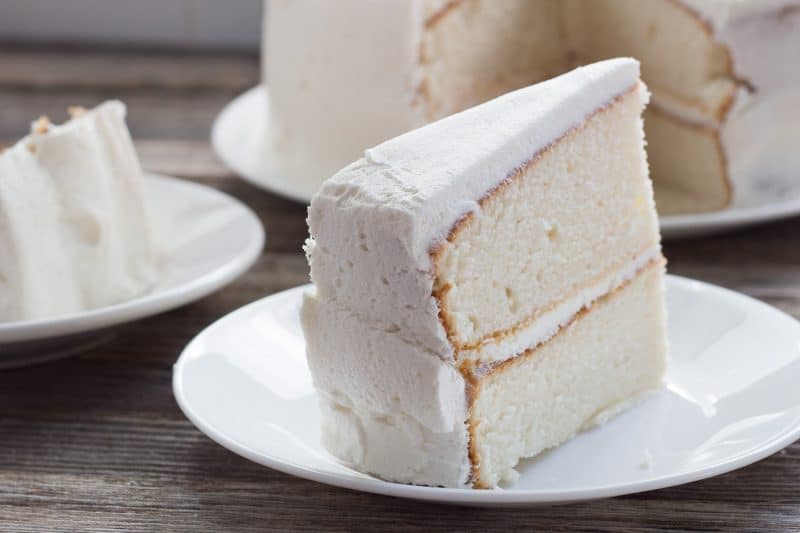
Update: We have new white wedding cake photos! One was accepted.

Yet, we have some photos accepted that have had less than 10 shares.
There are even a few of those posts that we currently have set as “nofollow.” Painful, but until we get back there for new photos and a re-write, they just aren’t worth wasting our allotted crawl time.
The White wedding cake photo is ready to be resubmitted since we now have new photos. We will do it eventually, it just isn’t on the top of the to-do list currently.
Being a blogger, your schedule can get mighty full mighty fast as you scale in size.
I will admit it was pretty exciting in the beginning. I was dusting off recipes, reintroducing foods into our weekly meals, and having some great memories and conversations.
Now that we have scaled up there is so much more to do. SEO, social media management, plugin maintenance, and the list goes on an on.
The fun part, cooking, and taking photos is a small part of what we do these days, yet it is still a vital part.
Once you hit the magical Mediavine number of 25,000 sessions in 30 days, you will add the coveted, yet elusive, Go for Teal goal to your daily plate.
Just a little side note, we love being with Mediavine and we will never regret waiting to hit their threshold before pursuing advertising.
We are currently working on an article on the timeframe it took for us to get there and the steps took in our journey between the first post and getting to Mediavine, so sign up to receive an email whenever we post a new recipe or article to be notified when it publishes.
Part of the process was stalking their website and reading every last bit of free information they have available on their blog.
I would highly recommend you start with reading through their information, apply the advice that you feel is good for your brand and tune out the rest of the “noise”.
That was the best advice I have ever read, and it came from one of the Mediavine publisher interviews.
UPDATE: May 2019 we hit AdThrive levels and were accepted. We made the change May 28, 2019. It happened so fast we never got around to publishing the above-mentioned post.
Why Submit to FoodGawker?
Well, as we stated earlier, FoodGawker is great for forcing you into your photography game.
FoodGawker serves another purpose for us, it provides exposure.

When Shari’s Berries reached out to use one of our photos, they found the photo of choice on FoodGawker.
Not our favorite photo by any stretch. But the lighting, composure, and angle were good.
We were only listed as number 23 on their post, but we were excited, it was the first time a large brand reached out to us.
Getting Accepted by FoodGawker
Ron’s very first submission was accepted.

How? We read through their gawkverse submission guide, several times. Do you see that bolded? SEVERAL TIMES!
The key to success with FoodGawker is to take every hint you get with the declination.
We say hint because they give some pretty obscure comments like:
- dull/unsharp when reduced in size
- composition – awkward angle
- dull/unsharp image
- photo/food composition
- low lighting and/or underexposed
- composition too tight/underexposed
- awkward angle, low lighting issues
In the beginning, we took every bit of constructive criticism handed out by the photo curation sites and made adjustments in the way we took photos. As we made changes, our rate of acceptance increased to 95%.
We do not worry so much about the rejections anymore. Once you start to get a bit of traffic, you won’t either. You might even find that rejections just make you more determined, it does me.
Every once in a while, I need a good rejection to put me back on my game.
Sometimes, I start getting rushed and sloppy. FoodGawker reminds me I need to get it together!
We are currently in the process of updating photos on our rejected photos and re-submitting.
Our styles and technical skills have improved with 2 years of practice.
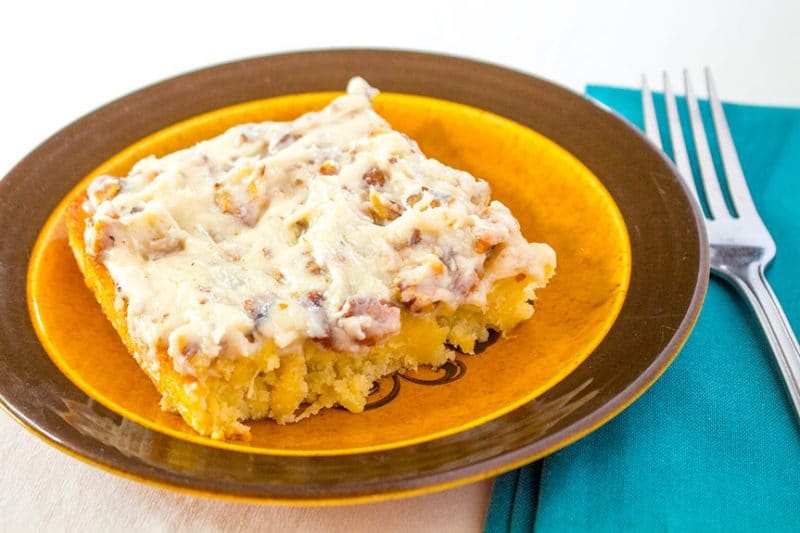
Compare beef and noodles photo above to Salted Peanut Caramel Bars.
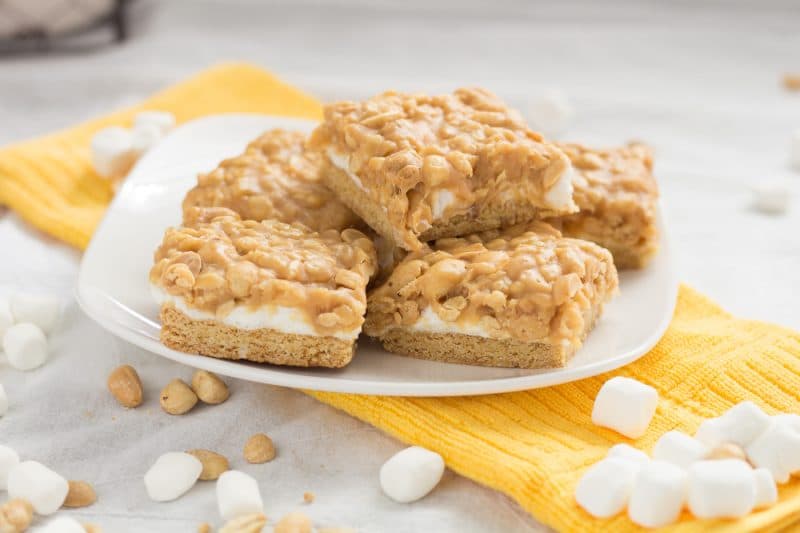
Which one are you more likely to make? Ya, me too!
In the beginning, I thought the beef and noodles photo was beautiful. It took a whole lot of practice and a whole lot of accepting constructive criticism.
Alternative Food Photo Submission
We get far more traffic from FoodYub on the days a new photo is submitted than we get from FoodGawker.
The combined traffic from these two sources combined has never brought us more traffic than Pinterest or Google Organic searches on any given day.
Just as a side note, FoodYub has rejected exactly 3 of our photos.
One we aren’t even sure how it got submitted since it was our logo, one was very pixelated, and the third must have been enlarged as we scrolled down the page to hit submit.
Tasteologie and Yummly are the only other places we share our photos. Neither of them is a quick game and neither will bring in a ton traffic on the day you submit.
Tasteologie won’t even let you know if you were accepted or declined either. You will know by searching their database or you might see one or 2 visits in your analytics.
These two probably won’t even bring in as much traffic in a lifetime as FoodGawker or FoodYub on the published date.
We rarely submit to Tasteologie anymore, and only to Yummly if one of us remembers to add it to our recipe box while managing our social media from the frontend.
Practice, Practice, and Then Take More Photos
The more photos you take, the more you practice photo editing, the more you experiment with lighting, and the more composition styling changes you try all lead to better photos.
Eventually, you will find your own style. You will know exactly what works for you.
We might even encourage you to go outside and take some photos, get to know your camera and your personal preferences.
Take photos of fruits, vegetables, photo props, etc. The more objects you photograph, the better your eye will get for your frame cut-off.
It also helps with learning the composition that best supports your style.
I don’t use a full-frame camera, so even though it looks great in the viewfinder or screen, there are going to be parts that make it into the photo that I didn’t see or didn’t have a feel for where it was.
I get a lecture at least once a month about a phone charger, a windowsill, a set of keys, or some other random item that has photo-bombed the best photo of the entire group.
Photo Equipment We Use
I outgrew my Canon PowerShot in just a few months. It’s still a useful camera for a construction business and gets used daily in that application.
I wanted/needed a camera I could easily mount on a tripod so that I could use a lower ISO with my not-so-steady hands.
If your hands are steadier than mine, you could get away with using this camera.
I prefer RAW format + JPEG images. RAW format is so much easier to edit and optimize. and JPEG allows me to see thumbnails without opening Adobe Lightroom.
Beth’s Photo Gear
Canon Rebel T5i with kit lenses


Canon 50mm f/1.8 – Since purchasing the 50mm, it has been mounted to the frame 95% of the time. It is usually non-food items being photographed when it is not mounted.

Canon Remote Switch RS60 E3 – this allows us to stand back away from the set-up while taking the photo. It is not necessary, but merely a luxury. It is great for the times your hands are dirty from touching food. This tool spends a lot of time in the bag these days.


Amazon basic 60-inch tripod – This one is a necessity for Beth. It allows the ISO to be set lower. She has not mastered the full manual settings just yet. Yes, even after 2 years. A tripod is required for longer exposure times, and unless your hands are steady, VERY steady, your photos will be blurry. If your photos are blurry, this is the very first piece of equipment I would add.


Reflector/Diffuser – This tool gets used more like a reflector than a diffuser. Although, it is pretty convenient to use as a quick diffuser if you have your food set up in an area without shades. The black is great for absorbing light if for some reason you feel you might have too much light. We don’t do too many “moody” photos, so we don’t use the black often.


Ron’s Photo Gear
Canon 70D
![]()
60 mm f/2.8 macro – this is one of Ron’s favorite lenses for shooting up close photos.


50 mm f/1.8 – This is the same 50mm lens that Beth uses. It is pretty economical as far as lenses go. It would be the first new lens we would both buy again. It is also Ron’s most used lens.
28-105 mm f/3.5-4.5 – Sometimes, Ron just needs an adjustable lens. This is his choice.


Horizontal Professional Tripod – This tripod is a few steps up from Beth’s basic Amazon tripod. It has a boom arm which is great for overhead shots. A word of warning when doing overhead shots though, make sure that you do not have steam rising directly onto your camera lens! You will need to set up a small fan or ask a helper to fan the steam away from the camera. You do not want that steam to get onto or into your lens or camera!


Remote Shutter Release – This is also another piece of equipment we both have in our arsenal of tools. It spends a lot of time in Ron’s bag too, but it sure is nice to have when you need it. It gets difficult at times to hold your reflectors exactly where you want them to be and still be able to reach around and press the shutter release.
Rectangular Reflector/Diffuser – this set of reflectors serves the same purpose as the ones Beth uses, just a different size.


For the differences in photos, take a look at our different posts. Although, this may not be a fair comparison as our shooting styles are vastly different.
There are not many pieces of equipment we use that are the same, but if you look you can see a pattern.
We both have 50mm lenses and use those the most often.
Tripods get used a lot, especially in low light situations.
Reflectors are good to have because they have both white and black in the kits. If you are on a budget then you can use foam poster boards instead.
Photo Editing Tools and Software We Use
Computer Monitor Calibrator


Desktop Computer with Monitor or All-in-One with a monitor to avoid huge fluctuations in the light.
You’ll need a dedicated spot for your setup. A room without a whole lot of light or a room where you have blinds to shut out a good bit of sunlight. Your monitor calibrator will help you identify if your spot is suitable for processing photos.
Adobe Lightroom Creative Cloud (CC)


We will be adding a post on backdrops and props used, so check back often to see the new props we have added to the collection.
Taking your Photos and Editing, A VERY short Crash Course
Before you start taking photos, make sure your camera can shoot in RAW. This will give you the most flexibility for editing in CC.
Set your camera to raw or raw+jpg. If you are doing strictly blog photos, just set it to raw because you won’t need the jpgs.
Set your white balance to auto. You’ll be able to adjust this in Lightroom, but you’ll have to do less editing if you just set it to auto.
Setting up your shot will take some time and practice. Look at Foodgawker and other food blogging sites for inspiration. Look at how they set up their food in relation to the lighting source and props.
You don’t need a dedicated area to take photos, but it can make your life a little easier if taking photos frequently.
You’ll want to light your subject from either behind or from the side. Avoid taking photos from light from behind the camera.
Lighting from behind or the side gives your subject some visual texture.
Lighting from behind the camera makes the lighting on the subject very flat and unappealing.
We recommend using an east, west, or north facing window with either a diffuser or a white drape that’s sheer.
Direct sunlight can sometimes be bad on a subject.
Ron uses softbox lighting for a lot of his photographs.
So go ahead and take your photos.
Connect your camera or memory card to your computer and import your photos using Lightroom.
I highly recommend you look at some tutorials or YouTube videos on how to import into Lightroom.
Lightroom isn’t very intuitive, but very powerful once you know how to use it.
The next steps are why it’s important to have a calibrated monitor. After you import your photos, you’ll want to look at your photo in the “develope” mode.
First, you’ll want to adjust your white balance. Use the eyedropper in the white balance area.
Then find an area in the photo that is either pure white or grey.
*Side note: This is why you will see a white object in many of our photos.
Click on that spot and Lightroom will automatically adjust your white balance.
You can manually adjust the temp and tint to get the photo to the feel you want it.
Sometimes we’ll lean to the blue or yellow portions a little more depending on if we want our photos to feel cool or warm.
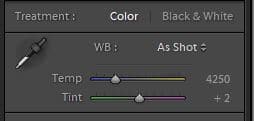
After your white balance is done, you’ll want to focus on your exposure level.
Using the histogram is probably the best tool for this. We typically aim for a peak in the histogram to the far right, but not on the edge.
Look at the histogram below for the same photos for an example of a proper adjustment of an underexposed photo.
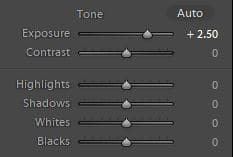

Most beginners don’t realize there is a histogram feature built into your camera to see on the fly if a photograph is over or underexposed.
Try to aim for a properly exposed photo from the camera.
A photo that’s too underexposed will have poor data in the dark regions of the photo.
An overexposed photo will have data problems in the blown out portion of the photo, so try an get your photos properly exposed from the beginning.
For us, 90% of the time a photo will only need white balance and exposure adjustment.
Sometimes a photo will require some contrast, black, or white adjustments.
We’ll also sometimes do a vibrance or saturation adjustment, but be careful with these because they can make the images look fake or just flat out weird.
You can adjust your photos without a calibrated monitor, but just note that while it might look right on your monitor, it might look wonky on someone else’s monitor.
A calibrated monitor will also help make sure that all of your photos from one photo shoot to the next kind of look right across the board.
Next, you can use the built-in function in Lightroom to export the photos to jpgs or photoshop for further tweaking.
Here are a few more examples of before and after: