
Amazon Associates Disclosure We are a participant in the Amazon Services LLC Associates Program, an affiliate advertising program designed to provide a means for us to earn fees by linking to Amazon.com and affiliated sites.
Ice Cream Cake Roll
Recipe for an Ice Cream Cake Roll that’s simple to make, has minimal cracks and can be filled with any ice cream flavor you like.
I love this ice cream cake combination, it makes me feel a little nostalgic. It reminds me of Newlyweds Ice Cream Cake Roll.
My dad and I used to share this when I was a kid. It came in a green and pink box.
Sometimes he dad would eat the last piece right out of the box.
Pan Size
I have used an 11.5″ X 17.4″ cookie sheet but my preferred pan is my 10″ X 15″ jelly roll pan.
You will need a large cookie sheet or an over-sized cooling rack for inverting this cake unless you are far more talented than I am and can flip out.
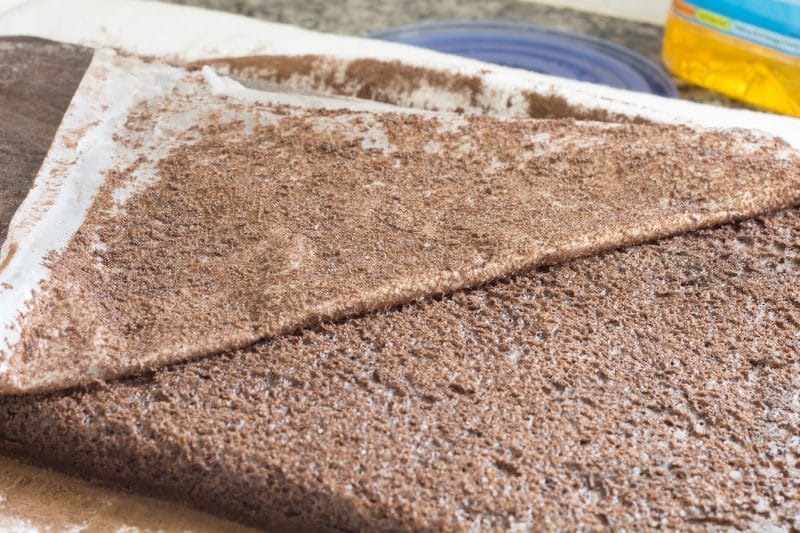
Rolling Hot Cake
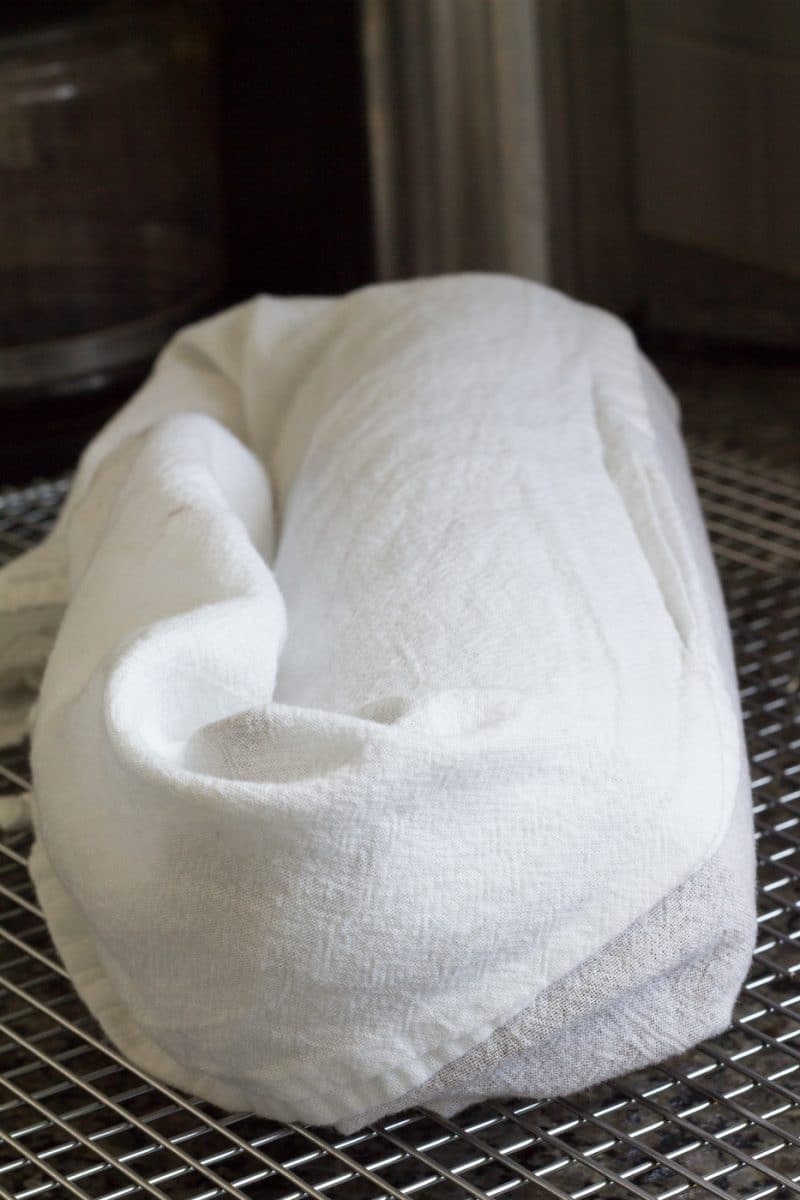
To keep the cake from sticking to itself when I rolled it I sprinkled the cooked cake with powdered sugar before turning it out onto a large flour sack towel.
Update: I use cocoa powder now, but either one is fine. The cocoa powder produces a nicer finished product.
After removing the wax paper, sprinkle the bottom of the cooked cake with powdered sugar or cocoa as well this will help keep the cake from sticking to the towel when it has cooled.
Then roll it up in the towel.
Just tuck one short end of the towel into the center portion of the roll before you start.
Some of the cake is going to stick to the wax paper or parchment paper, so peel back very slowly to avoid pulling out pieces of the cake.
The easiest way for me to turn the cake out was to put a towel over the cake while it was in the pan, then covering the towel and pan with my cooling rack.
Then I just flipped the whole thing over and grabbed the hot pan with my tongs.
If the edges of the cake are crusty, cut off the edges, and eat them. My cake did not have any this time.
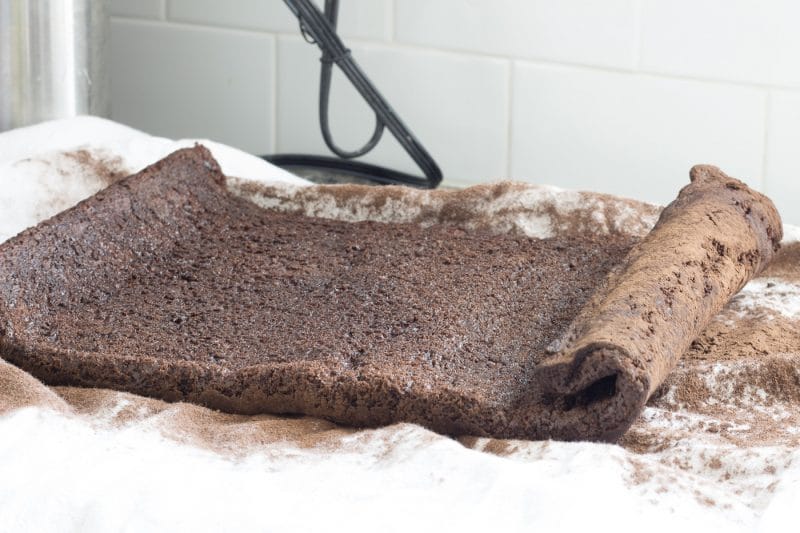
Gently roll the hot cake in the towel, starting with the short end.
Set it aside on a cooling rack until it is completely cooled. I usually wait for at least 3 hours.
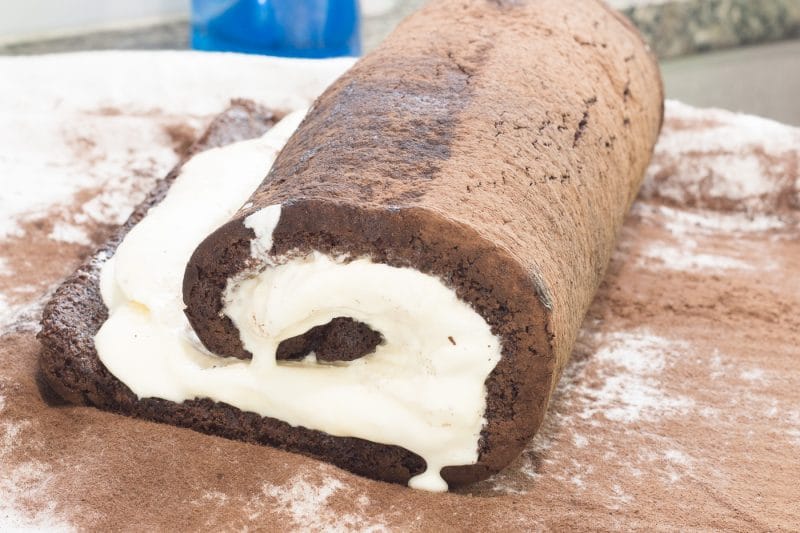
Unroll the Cooled Cake
Once the cake is completely cooled unroll the cake, but leave it on the towel.
You will use the towel later to assist you with rolling it back up.
The end may stay a bit curled and it is OK. I tell you what to do with that part in a minute.
There are a few cracks in the uncurled piece. No worries, it is going to be right in the middle of the cake.
The cake will crack some after it has cooled and you unroll it.
The best you can do is minimize the cracking.
Cover the cracks with some sort of topping and it will be delicious no matter what.
Filling the Cooled Cake
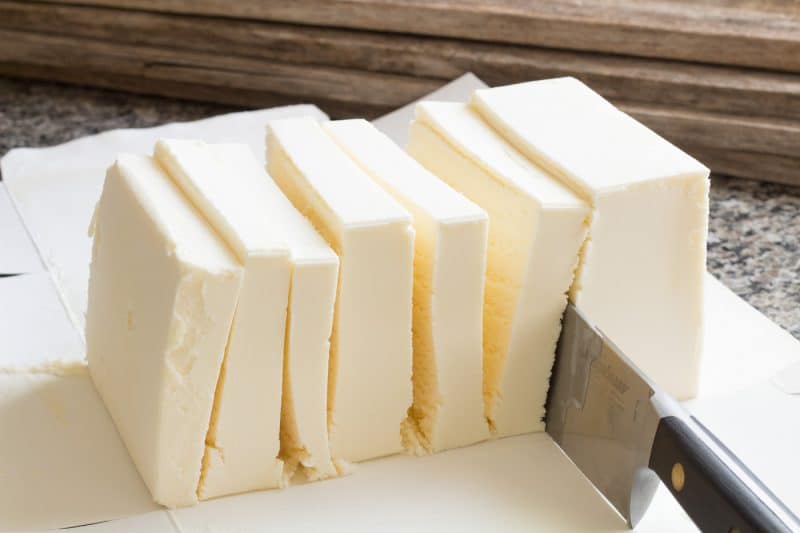
Take a “box” of ice cream out of the freezer and open it completely so it looks like a square of ice cream.
Start slicing the ice cream in 1/4 to 1/2 inch slices with a large knife. You really want to be able to cut through it in one motion.
You can also allow the ice cream to soften slightly and just spread it on. I prefer to slice and place.
Once the Cake is full, stop slicing. You may have ice cream leftover, just pop it back in the freezer and eat it later.
I usually start by filling the tight curl at the end of the cake.
This part has never wanted to unroll for me, so I just go with the flow and stuff some ice cream in there. I cut one of the ice cream slices into smaller pieces and pack it in.
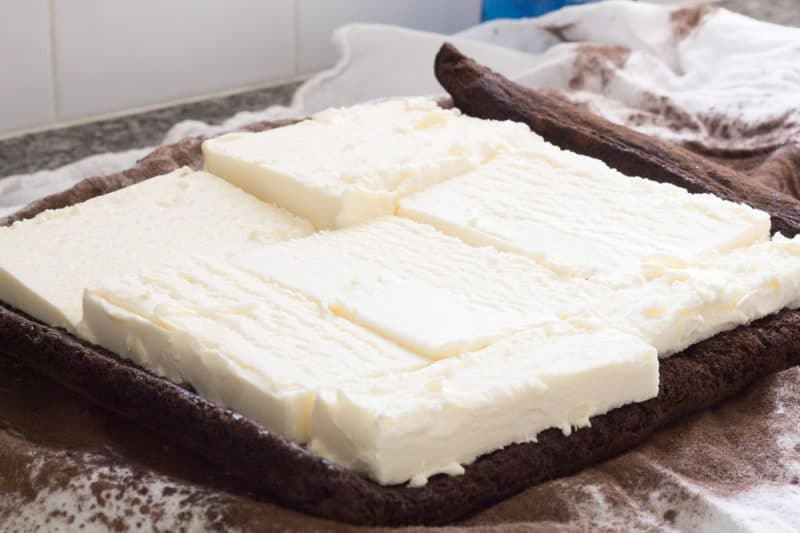
Once that is filled, start lining up the ice cream slices along with the cake.
Lay the pieces as close together as possible. You can start at either end.
You can leave an inch or so on the sides empty, ice cream will fill that area as you roll it back up.
Some of your pieces may be thicker than the others, this is OK too. We are going to let this sit for 10 to 15 minutes until it is slightly softened.
Do not walk away during this waiting period, if you forget you have sliced ice cream sitting on the cake, it will begin to absorb and melt over the edges running onto the towel and the countertop.
If you aren’t quick enough to remember you left it on the counter you may find yourself mopping the floor. I’ve done this.
Any large gaps can be filled with smaller pieces of remaining ice cream slices. I usually don’t worry too much about the gaps.
When the cake has been covered with ice cream and has softened, gently smooth out the ice cream.
Once that is done it is time to start rolling it up jelly-roll style.
Rolling the Filled Cake
Start rolling the cake up, starting with the end that didn’t want to lay flat. Roll it as tight as you can. This is when the ice cream will work its way to edges.
Wrap the cake roll in plastic wrap and place in the freezer until the ice cream roll is solid.
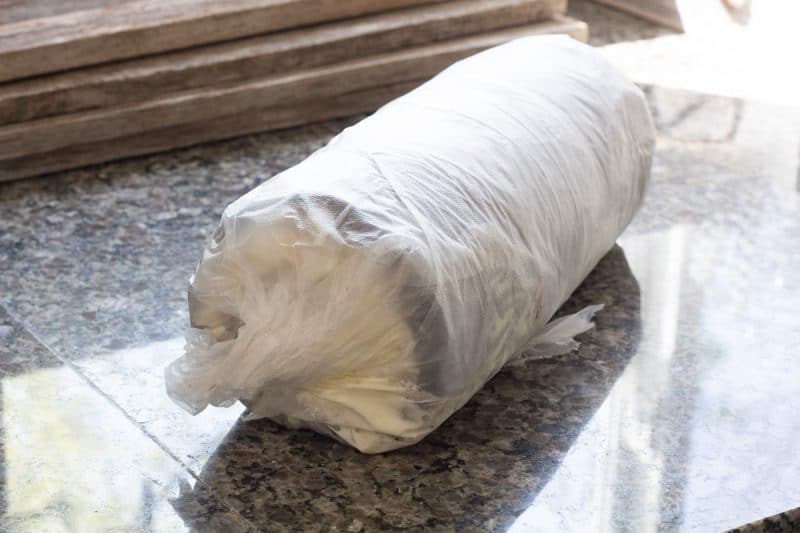
It takes at least 3 hours for ice cream to become solid again.
If your freezer is full or set at a lower temperature, it may take overnight. This really isn’t a dessert you can make and enjoy immediately.
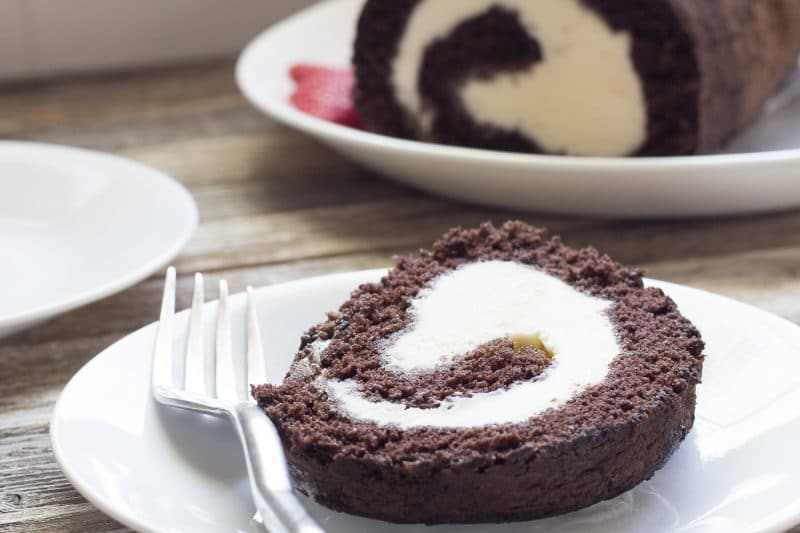
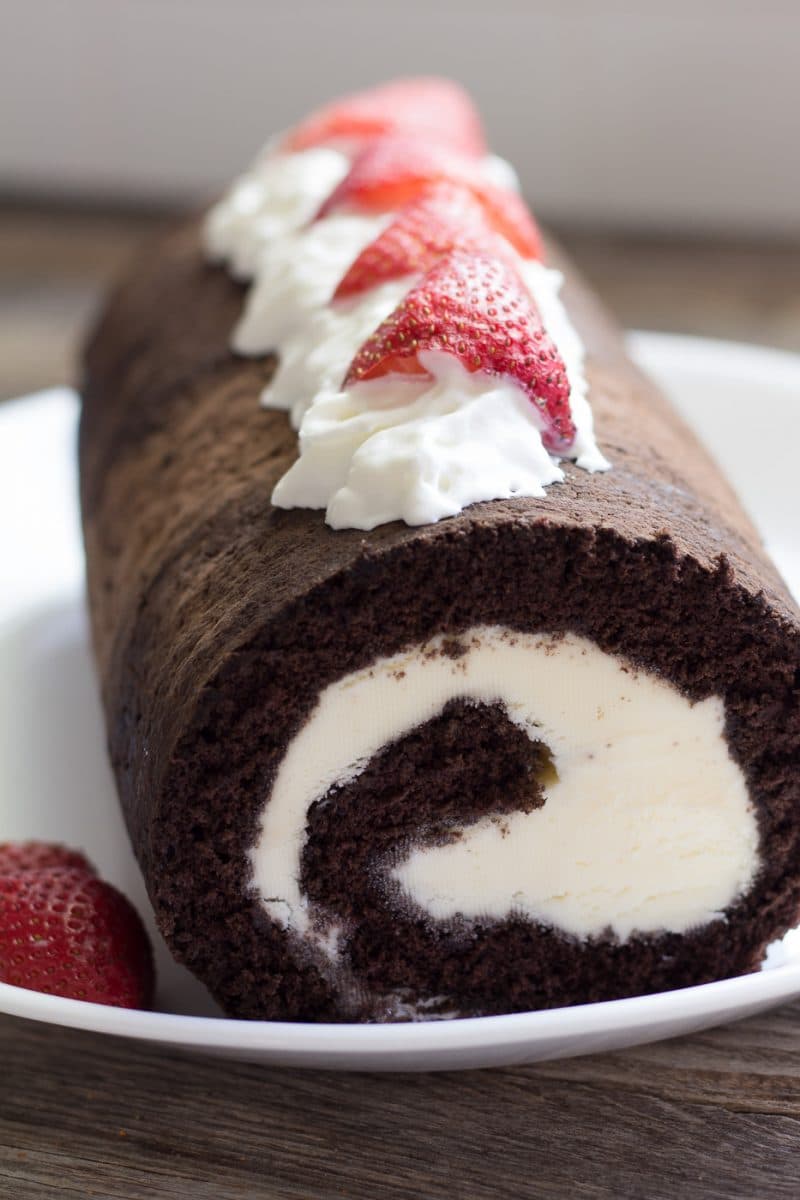
Serving
Once frozen solid, remove from the freezer 5 to 10 minutes before you plan on serving, it makes it a bit easier to cut into neat slices.
The end pieces will not be as neat as the middle pieces.
I generally cut them off if I put them back in the freezer if I am serving this to company and want neat ends. If we are eating at home and the presentation is not an issue, we eat the ends first!
A large kitchen knife is the best way to cut this. If you find it difficult to cut through, heat your knife under hot water, dry off the knife and try slicing again.
You can reduce the thickness of the ice cream if you desire. It will make your cake log thinner.
Cocoa Powder keeps your finished product from having that grey hue and will resolve the off-color and stickiness produced on the finished cake.
Hershey’s Special Dark can be used for a darker cake with a richer taste. Add 1/2 teaspoon of baking soda in addition to baking powder.
MORE DESSERT RECIPES
FOLLOW US ON SOCIAL MEDIA AND SHARE THIS DESSERT RECIPE
SIGN UP TO RECEIVE NOTIFICATIONS AND NEVER MISS AN UPDATE

Ice Cream Cake Roll
Equipment
- Jelly Roll Pan
- Kitchen Towel
Ingredients
- 1 cup all-purpose flour
- 1/4 cup cocoa
- 1 tsp baking powder
- 1/4 tsp salt
- 3 eggs
- 1 cup sugar
- 1/3 cup water
- 1 tsp vanilla
- 1/2 cup powdered sugar or cocoa powder for dusting cake prior to rolling hot cake
- 1/2 gal ice cream any flavor that is available in a square box
Instructions
- Preheat oven to 375 degrees F. Coat a 10 X 15 baking pan with baking spray.
- Line pan with parchment paper or wax paper.
- Spray paper with more baking spray.
- In a small bowl, mix together the flour, cocoa, baking powder, and salt.
- In a large bowl, beat the eggs until thick and light colored.
- Add sugar a little at a time, mixing until incorporated.
- Add water and vanilla, mix until blended.
- Add the dry ingredients that have been previously combined.
- Beat until batter is smooth.
- Pour into cake pan and smooth out the batter.
- Bake for 12 to 15 minutes, or until a toothpick inserted in the center of the cake comes out clean or with a few crumbs.
- Loosen the edges of cake from the pan.
- Sprinkle powdered sugar or cocoa over the top of the cake, using up to half.
- Place a towel over cake.
- Cover with a cooling rack.
- Invert the cake.
- Slowly and gently remove the paper from the bottom of the cake.
- Sprinkle the bottom of the cake with powdered sugar.
- Cut off edges of cake if crusty.
- Roll the cake, starting with the short end, keeping the towel between the rolls.
- All the cake to cool for several hours on the cooling rack.
- Once completely cool, gently unroll the cake and remove the towel.
- Remove the box of ice cream from the freezer.
- Open the box at all openings so there is a block of ice cream.
- Slice ice cream in 1/4 to 1/2 inch slices and place on the unrolled cake.
- Re-roll the cake and wrap tightly in plastic wrap.
- Place in freezer and allow ice cream to refreeze. Depending on the thickness of the ice cream and freezer temperature this could take 4 hours or overnight.
Notes

Nutrition
Nutrition information is automatically calculated and may vary based on exact ingredients used. For accuracy, consult a registered dietitian or nutritionist.
I’m making the ice cream cake roll today and this is the second time I’ve made it. It turned out perfectly the first time and I’m expecting the same thing today. I was very very happy to find this recipe. Thank you.
Hi Ruth!
I’m happy you found this recipe and using it again! Thank you for coming back to let me know AND leaving a review!
Do you double all ingredients to make 2 rolls?
Hi Brenda!
Yes, this recipe is for only one cake roll at a time.
This has been a family favorite for a few years now!
Hi Katie!
I’m happy to hear that! This is one of my favorites too! Thanks for stopping back by to leave us a review! Happy Holidays!
I have made this Ice cream cake roll several times. So easy to make and so delicious to eat. Thank you for the recipe.
Hi Sue!
I’m happy to hear this recipe is working out so well for you! Keep your eye out, I should have a new vanilla cake roll coming soon, it’s coming up quickly on the photo shoot calendar. Thanks for coming back by to leave a review!
Excellent recipe, very easy and quite good. I add 1/3 cup of coffee instead of the water. Excellent with maple walnut ice cream rolled up into it Enjoy everyone
Hi Deb!
I love the maple walnut ice cream and chocolate combination! And adding coffee instead of water is a great way too boost the chocolate flavor without adding coffee flavor. Thanks for stopping by and letting me know how it went for you and leaving a review! It means so much to me when I hear from readers!
Made this with dark cocoa and added 1 tsp espresso granules
Came out wonderful
Hi Chris!
I love the addition of espresso powder! I bet that truly enhanced the chocolate flavor! I’m happy to hear you liked this recipe!
Happy Holidays!
It turned out awesome. Everyone LOVED IT !!!!!
Hi Tanya!
Thanks for stopping by and leaving a review! I’m happy to hear you really like this and it turned out!
THe cake rolled and unrolled nicely. It held together with out cracking. Thanks for the tip about taking the whole block of icecream and slicing it!
Hi Paula!
I am so happy to hear your cake didn’t crack! Also happy you found that tip useful for slicing ice cream. Thank you for visiting again and leaving a review!
I’ve been searching for the Newlywed cake from Deans for years. It was always my birthday cake of choice. I’ve made this recipe many times for family functions. Everyone raves about this cake. Thanks for sharing the recipe.
Hi Laura!
I’m happy to hear that your family likes it! Thanks for stopping by again and leaving us a review!
This is easier and just as good as other cake roll recipes where the eggs are separated and whites folded in. Your instructions were thorough and clear – thanks!
Hi Jane!
Thanks for visiting and leaving such a nice comment! I’m very happy it was successful for you!
I made this today and it turned out just fine…it tastes really good…I then made a second one, a vanilla one, using 1 1/4 cups flour, adding 2 tsp vanilla and the same ingredients except the cocoa. It turned out wonderful and so good! The texture was even better than the chocolate one but both are now in the freezer filled with ice cream. What a great dessert!
Hi Cyn!
I love the changes to make it vanilla! Thanks for stopping by and letting me know.
Cheers!
So easy to make. Followed directions exactly and it was wonderful. Beat the eggs awhile before adding sugar. Beat in sugar in 1/4 cups and allow stand mixer to beat thoroughly. Be sure not to over bake as it will crack when you roll. Delicious!
Hi Jane!
Thanks for visiting again and sharing those useful tips.
Cheers!
Just made this today. I did have one large crack but I made it the bottom. Next time I’ll be more careful rolling and use the towel as you said! Is delicious! I always loved it as a kid, and your directions were spot on! Any idea how long this will keep sealed up in the freezer?
Hi Tammy!
I’m glad you liked the recipe! I have kept mine in the freezer, wrapped tightly for up to 2 months. Like any ice cream, it starts to deflate after that time. Hope this helps!
Cheers
My mother always served this at Christmas. She has been gone for 20 years now, and I suddenly remembered her tradition. So, as a tribute to her memory, I made this for Christmas. Delicious. I will make a renewed tradition. Thanks for the memory.
Hi Paul!
I am so happy that you were able to renew a memory! This is why I share my recipes!! Thank you for coming back to visit to let me know.
Happy Holidays!
Hi
I’ve made this twice now. The first time with generic ice cream. Tasted blah. The second time with brand name ice cream. I find the cake isn’t a rich flavor as I recall the Newlywed cake to be. I am a baker and will fool around with the ingredients until I get the Newlywed flavor! The company that makes the Newlywed cakes are in Indiana and last I knew they were still in business.
Hi Louise!
Thanks for the info on locating one. I’ll be sure to look for the original next time I’m through Indiana.
Cheers!
Thank you for sharing your recipe!! This dessert is a favorite of my husband’s which I usually make with a box cake mix; however, your recipe is easy! I’m sure he will love it!! I use unsweetened cocoa powder (generously) as well to prevent the cake from sticking to the linen/flour towel.
I hope he likes it as well as I do! This one is probably my most personal favorite dessert on my entire site!
Thanks so much for sharing this recipe! I did have some cracking but that was on me…I wasn’t as careful as I should have been. Know better next time! Had no problem getting it out of the towel-used sifted cocoa as you suggested. It was so delicious and super easy!! Will be making again. 🙂
Hi Chris!
I’m so glad you liked the recipe! This is my favorite dessert!
Cheers!
Do you use regular cocoa or baking cocoa?
Hi Debi!
I just use unsweetened cocoa powder.
Cheers!
I made the cake tonight. But my cake stuck
To the towel? I sprinkled the powdered sugar over
The cake?
What did I do wrong? First time
Making a cake like this.
Hi Leeann!
Sorry to hear your cake stuck! Every once in a while I get a bit of sticking that I have to gently pull the towel away from the cake. That usually happens when I have wrapped the cake too tight. Sticking can also happen when there isn’t enough powdered sugar or cocoa between the cake and the towel. The sugar seems to melt and turn gummy. I also use flour sack towels because they aren’t fluffy.
Hope this helps!
My first time making this. It cracked into 3 main pieces. I stacked alternating layers of cake and ice cream. I used regular cocoa powder in the cake. Definitely needs the dark type. It was not very chocolatey. Disappointed, but I will try again some day.
For those wanting a deeper favor, I suggest using a tablespoon or two of espresso powder. I always add it to chocolate batters. I don’t usually adjust the flour amount, especially for just one tablespoon.
HI Pattie!
Thanks for that tip! I add it to my chocolate wedding cake and never thought to add it here. I’ll bet that does make it much better.
Cheers!
Do you have any recommended substitutions to make this vanilla? Thanks!
Sorry, I don’t currently have one. I have a recipe that is in development but I haven’t made it enough times to guarantee it’s a success.
Oops, one question. Where do you find square ice cream??
Hi Juju!
The cheaper ice cream comes in a box in a box in my area. Believe or not, a person in this house prefers generic ice cream! If you can;t find square ice cream, you can still just the “other” kind. Just let it soften a bit and then scoop it out in smaller scoops so you can spread it out. I did a quick image search and it appears that you were not dreaming the ice cream coconut snowballs!
I use the “other kind” ice cream & use a butcher’s knife to cut through the cardboard & slightly softened ice cream to make squares. Delicious!!
I’m thrilled to hear it turned out so well!
Haven’t made this, YET! I too, miss the ice cream cake roll. It seems that I remember it being sold around Christmas time, along with the ice cream Snowball that was covered in coconut and was decorated with Holly leaves. It also came with a candle! Or, I could be completely nuts and have imagined the whole thing.
I can’t wait to try this as it was one of my favorites as a kid. I’m not what I consider a “baker”, can I just use a cake mix?
Hi Kathy!
You can probably use a cake mix. I have never done it with one. The worst outcome is you have a cracked but delicious dessert! The recipe used here reduces the amount of cracks. I would love to hear back from you how it goes when you make it!
Where can I buy the original ice cream cake roll that I have lived since I was a kid?
I wish I knew!! I would be at that location regularly buying them!
I used to eat this with my Daddy when I was a little girl! I have searched and searched to find it. I found it one time back in 2004. And have not found it since! So I decided to look and see if there was a good recipe for one and I’ll just make I myself! So here I go…off to the kitchen! I’ll post pics of the result and let you know how it tastes! Wish me luck!
They no longer make it. I heard they have not made it in three years now because the cake company went out of business. Ugggg
Last time I was in Chicago. they sold the original packaged ice creal cake roll. I know that’s not much help but at least we know they still make it.
Hi Barbara!
Thanks for the info!
If I ever make it “back home” you can be sure I’ll be looking for one.
Cheers!
I have searched for the vintage ice cream cakes we bought back in the late 50’s and 60’s. I did not remember the name newlyweds cake but it was in a box and it was always a treat to have…I can’t wait to try your recipe.
Hi Lanita!
Thanks for stopping by!
I hope you enjoy it as much as we do! It isn’t a perfect copycat, but it is close enough that it brings back fond memories of childhood every time I eat it!
Beth