
Amazon Associates Disclosure We are a participant in the Amazon Services LLC Associates Program, an affiliate advertising program designed to provide a means for us to earn fees by linking to Amazon.com and affiliated sites.
Italian Beef Recipe


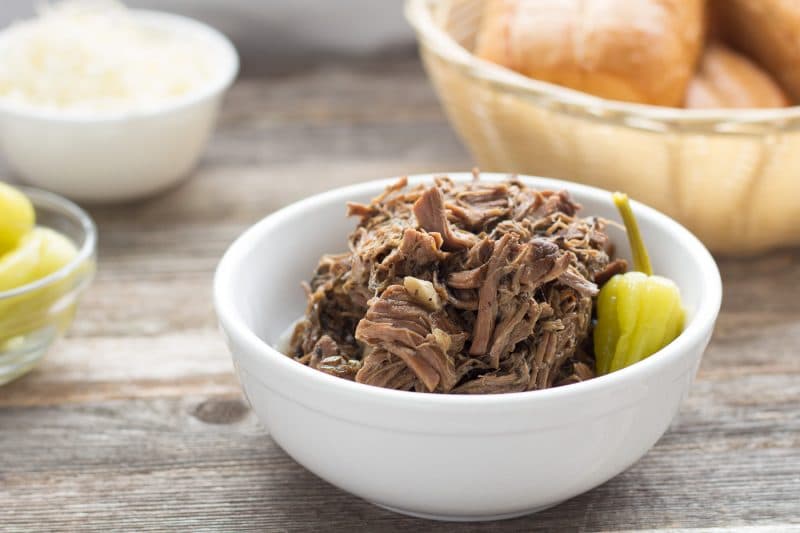
Easy Italian Beef Recipe can be made in a slow cooker, braised in the oven, and even simmered on the stovetop. Enjoy all the spicy flavors you expect in a shredded beef sandwich no matter how you make it.
Our recipe gets all of its flavors from spices, pepperoncini peppers are used as a condiment. There is no vinegar in a true Chicago Style sandwich, nor does it have Italian salad dressing mix packets added to it either!
If you’re looking for shredded beef with pepperoncini peppers, you should go grab our pepperoncini beef recipe.
What Cut of Meat is Used for Italian Beef?
Top Round
The traditional cut of beef used is a top-round roast. If you have a commercial kitchen slicer, this would be ideal because you could cut it across the grain to get those tender, thin slices you find at Portillo’s and other restaurants.
These are nowhere near an original Chicago Italian Beef that can easily be found in that area. Those are made with beef roasts cooked to rare in a flavorful broth, then sliced into thin perfection pieces of meat.
The meat is dipped back into that wonderful broth and slapped onto a sturdy Gonnella roll (which are unfortunately only available in and around the Chicago area grocery stores).

I’ve tried recipes that called for rare beef, thinly sliced and simmered in broth, but I could never get a kitchen slicer or knife to recreate that perfect tenderness of the original beef in Chicago. So now I used the shredded beef method. It turns out more like an Italian “flavored” shredded beef in a spicy au jus.
You will never find shredded meat at a hot dog stand, but unless you have a commercial slicer, slicing beef appropriately as a home cook is almost impossible. I have burned through 2 meat slicers trying! Shredded is not perfect, but it will get the job done and its less work anyway. Top round will work for this recipe.
Chuck Roast
Chuck roast is probably the roast I use the most for this recipe. It’s relatively cheap as far as beef goes. It holds up well under a long slow simmer and actually needs a long braise to become tender. A chuck roast is also not so thick that it produces really long strings of beef when shredded.
Rump Roast
Rump roast would be my second choice. This cut also requires a long slow braise to make it tender without the ability to slice it thinly across the grain. This can be an economical choice if you happen to catch it on sale. The only drawback to this cut is that it can be kind of thick. To prevent the beef piece from being too long, I cut it in half after cooking and then shred it.
Bottom Round
Bottom round roast starts getting into a higher price range. It’s supposed to be slightly more tender than rump roast, so they charge more. You can use it, but I would opt for a cheaper option if there is one available.
How to Shred the Beef
Remove the meat from the cooking liquid and allow to cool slightly before attempting to shred it. There is going to be some fat and other things that may require hands to get rid of.
The meat may start to fall apart as you pull it out of the broth. This is good, it will give you some idea of which direction to shred it.
On a cutting board or another plate, add a section of cooked beef and start to pull it apart. Don’t shred it too finely though, it will continue to fall apart after it is added back to the cooking liquid!
As big chunks of fat or sinew turn up, remove them and discard.
Once all of the beef is shredded, add it back to the cooking liquid and set it to low.
The Gravy
It’s called gravy when served with this type of sandwich, but it’s really just an au jus. There should be no reason to have to add anything more to the cooking liquid at this point. It was added when you started the dish.
Don’t be put off by the amount of beef broth and base used in the beginning. All that beef flavoring, garlic, and oregano will give great flavor to the beef, but the real purpose is to have a good gravy. It can be spooned over the meat on a sandwich and served on the side for dipping.
The Bread
If I were back home, I could easily buy Gonnella Rolls in the store. But I could also easily buy a whole Italian beef sandwich. If you have access to Gonnella or Turano hard rolls, those are the absolute best for holding wet beef without falling apart so they can be dipped into the au jus!
I prefer to serve these with hoagie rolls, hard rolls, Kaiser rolls, or any sturdier roll but in a pinch, any sub roll will do. It is just going to fall apart more readily. Soft sub rolls will do if the gravy is served on the side!
Cheese Topping
Most folks just say no to cheese, and we don’t eat ours with cheese. However, guests always ask for cheese whenever I serve these, so I offer shredded mozzarella. Don’t use the dusty package stuff for this. Hand shred this from a block of mozzarella. It will melt so much easier.
Alternatively, you can use sliced mozzarella. This will require a quick run under a broiler.

Ingredients
- Chuck roast (or other cuts of beef if on sale)
- Garlic – you will want to use fresh; you will be cutting the cloves into slivers and placing them into the meat.
- Condensed beef consommé (cans) – you can substitute this with any homemade beef stock you have.
- Beef bouillon cubes or concentrated beef base (optional) – I use them because they add more beefy flavor to the gravy. Since we aren’t reusing the gravy all day like sandwich shops, it won’t be as beefy.
- Dried oregano – nothing fancy here; you will be using 3 tablespoons or more.
- Red pepper flakes (adjust to taste for heat)
Directions
- Start by heating your oven to 350°F.
- Prepare the roast beef by removing any silver skin, excess gristle, and large fat deposits. Create small cuts across the roast and insert slivers of garlic into these cuts.
- Position the roast inside a roasting pan with a lid or use a Dutch oven.
- Evenly sprinkle oregano over the roast, lightly season with red pepper flakes, and evenly pour condensed consommé on top. Mix the bouillon or beef base with the liquid. Add water as needed to ensure the beef stock level reaches the top of the roast.
- Secure the pan with its lid or seal it tightly using aluminum foil. Transfer to the oven and let it cook slowly for 3 to 4 hours, or until the roast can be effortlessly pulled apart using two forks.
- Once cooked, take the roast out of the pan and pull it apart into shreds.
- If needed, warm the shredded meat in the broth over low heat.
- Use tongs to arrange the shredded meat onto sliced hard rolls. Accompany with pepperoncini for added flavor. Pour the broth into separate small bowls to use for dipping the sandwiches.
- For those preferring a slow cooker method, you can cook the roast on a high setting for 5 to 6 hours or on a low setting for 8 to 12 hours.
What Goes Well with Italian Beef Sandwiches
Pairing the right side dishes with Italian beef sandwiches can round out the meal beautifully. Here are some classic options to serve alongside:
Potato Salad: A creamy or vinaigrette-based potato salad can balance the richness of the beef with its cool, creamy flavor.
Coleslaw: Offering a tangy crunch, coleslaw is a refreshing side that goes well with the tender, juicy beef.
Roasted Vegetables: Simple roasted vegetables like carrots, brussels sprouts, or asparagus provide a healthy and colorful side that complements the savory flavors of the sandwich.
Garlic Parmesan Fries: Fries tossed in garlic and Parmesan add a crispy, flavorful option that’s hard to resist.
Pasta Salad: A cold pasta salad, perhaps with an Italian dressing, olives, and cherry tomatoes, can be a light yet delicious side.
Chips: Sometimes, simplicity is key. A bowl of kettle-cooked potato chips adds crunch and saltiness that goes perfectly with the soft bread and juicy meat.
Pickled Vegetables: Offer a variety of pickled veggies like spicy giardiniera, cucumbers, beets, or peppers for a tangy crunch that cuts through the fat of the meat.
Garden Salad: A simple salad with mixed greens, cucumber, tomato, and a balsamic vinaigrette offers a fresh counterpoint to the hearty sandwiches.
Antipasto Salad: For a heartier salad option, an antipasto salad with salami, mozzarella, olives, and pepperoncini peppers mirrors the Italian theme.
Macaroni and Cheese: For a traditional side, creamy macaroni and cheese pairs wonderfully with the savory flavors of the beef.
These side dishes not only complement the flavors and textures of Italian beef sandwiches but also help create a balanced and enjoyable meal.
Does This Have to Be Served as a Sandwich?
Nope! I have some gluten-free friends and I serve this on mashed potatoes or white rice when they are eating at my house.
Can I Make This in a Crockpot?
- Prepare the Roast: Follow the initial steps to trim any excess fat and silver skin from the roast and insert garlic slivers into slits made all over the meat.
- Layer the Ingredients: Place the prepared roast in the bottom of the crock pot. Sprinkle the oregano and red pepper flakes over the meat. Pour the condensed consommé over the top, ensuring the meat is well-coated. Add the bouillon or beef base to the liquid around the meat. If the liquid doesn’t cover the meat, add a little water until it just reaches the top of the roast.
- Cook: Cover the crock pot with its lid. Set the cooker to low and cook for 8 to 12 hours, or set it to high and cook for 5 to 6 hours. The goal is for the meat to become so tender that it easily shreds with a fork.
- Shred the Beef: Once the meat is cooked and tender, remove it from the crock pot and shred it using two forks. This should be easy if the meat is properly cooked.
- Serve: Return the shredded beef to the crock pot and mix it with the juices. Let it warm through if it has cooled down. Serve the Italian beef on toasted hard rolls, with pepperoncini on the side, and some of the cooking liquid in small bowls for dipping.
Using a crock pot for Italian beef allows the flavors to meld beautifully and the meat to become exceptionally tender, making it a perfect set-it-and-forget-it meal for any day of the week.
What About an Instant Pot?
The Instant Pot method significantly reduces the cooking time compared to traditional oven roasting or slow cooking while still delivering a delicious Italian beef.
- Prepare the Meat: Start by trimming any excess fat and silver skin from the roast. Make small slits all over the meat and insert garlic slivers.
- Season the Roast: Place the roast in the Instant Pot. Sprinkle with oregano and red pepper flakes. Pour the condensed consommé over the meat. Add the bouillon or beef base to the pot. If the liquid doesn’t quite cover the meat, add a little water until it just reaches the top of the roast.
- Seal and Cook: Secure the lid of the Instant Pot and make sure the valve is set to “sealing.” Use the “Manual” setting and set the Instant Pot to cook on high pressure for about 60-80 minutes, depending on the size of your roast. The general rule is about 20 minutes per pound of meat.
- Natural Release: After the cooking time is up, allow the pressure to release naturally for about 10-15 minutes, then carefully turn the valve to “venting” to release any remaining steam before opening the lid.
- Shred the Beef: Remove the roast from the Instant Pot and shred the meat using two forks. It should be tender and easy to pull apart.
- Serve: Return the shredded beef to the Instant Pot to mix with the juices. Set the Instant Pot to “Sauté” mode if you need to reheat the beef quickly. Serve the Italian beef on toasted hard rolls with pepperoncini and provide some of the cooking liquid in small bowls for dipping.
Storing and Reheating Italian Beef
Cooling Down:
- Let the beef cool but don’t leave it out for more than 2 hours to stay safe.
Storing in the Refrigerator:
- Put the beef in containers that seal tight. Keep the gravy in the same container to keep the beef tender. We don’t recommend freezer bags for this one, they could leak. If you must use one, I would let it freeze with the zipped end up.
- Mark the date on them so you know when you stored it. It’ll stay good in the fridge for 3 to 4 days.
Freezing for Later:
- If you want to keep it longer, freeze it. Use containers or bags meant for freezing. The gravy will protect and keep the beef tender, so you don’t need to leave extra space for liquids.
- Write what it is and the date on it. Try to eat it within 2 to 3 months for the perfect taste.
Warming It Up:
- If you freeze it, allow it to thaw before reheating.
- To warm it, use the microwave, stove, or a slow cooker. Since it has its own gravy, you don’t need to add water. Gently heat it until it’s hot all through. On the stove, just put it in a pot and warm it slowly. Stir it a bit to make sure it heats evenly.
- If using a slow cooker, set it on low. This way, the beef gets warm slowly and stays juicy.
A Quick Safety Check:
- Heat the beef until it’s at least 165°F (74°C) to make sure it’s safe to eat.
By following these tips, your Italian beef will remain delicious and ready to enjoy

FOLLOW US ON SOCIAL MEDIA AND SAVE THIS RECIPE
SIGN UP TO RECEIVE NOTIFICATIONS AND NEVER MISS AN UPDATE

Italian Beef
Ingredients
- 5 pounds roast chuck roast works the best, but I use other cuts if they are on sale
- 6 cloves Garlic cut into slivers
- 2 cans condensed Beef Consomme
- 4 beef bouillon cubes or 1 Tablespoon concentrated Beef Base (optional)
- 3 Tablespoons Dried Oregano
- 1 pinch Red Pepper Flakes more if you like heat
Instructions
- Preheat oven to 350°.
- Trim roast of any visible silver skin, gristle, and large pieces of fat. Cut small slits all over the meat and insert garlic slivers.
- Place roast in a roasting pan that has a fitted lid.
- Cover with oregano, sprinkle with red pepper flakes and pour condensed consommé over the top. Add the bouillon or beef base into the liquid. Add water if necessary to bring the liquid up to the top of the roast.
- Place lid on the pan, or tightly cover with aluminum foil. Place in preheated oven and slow roast for 3 to 4 hours or until meat is easily shredded with 2 forks.
- Remove meat from liquid and shred. Place meat back into broth and reheat over low heat if necessary.
- Use tongs to place meat on sliced hard rolls. Serve with pepperoncini. Add broth to individual small bowls for dipping sandwiches.
- This recipe can be made in a slow cooker. Cook on high for 5 – 6 hours or low for 8 – 12 hours.
Notes

Nutrition
Nutrition information is automatically calculated and may vary based on exact ingredients used. For accuracy, consult a registered dietitian or nutritionist.
This recipe was written and tested by a human.
Editor: Oliver Baysinger