
Amazon Associates Disclosure We are a participant in the Amazon Services LLC Associates Program, an affiliate advertising program designed to provide a means for us to earn fees by linking to Amazon.com and affiliated sites.
Italian Wedding Cookies


Italian Wedding Cookies are delicious little, powdered sugar-coated, butter cookie bites with almonds.
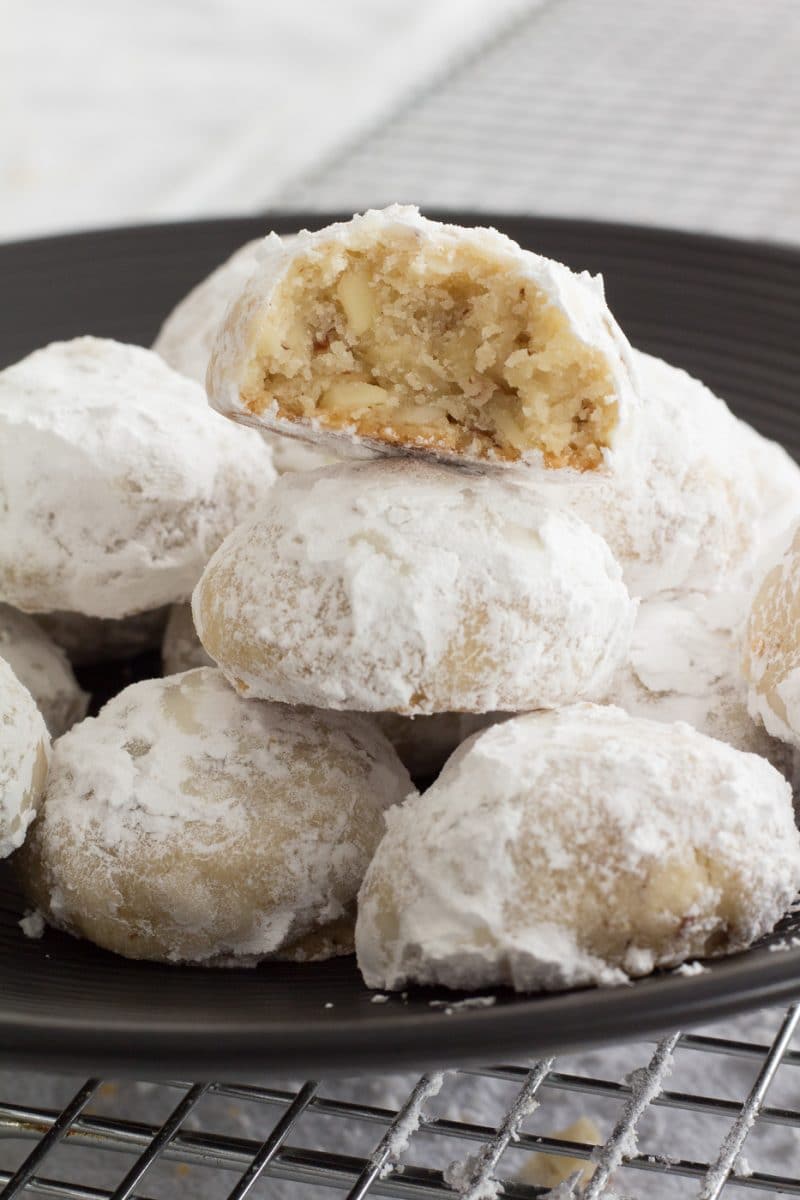
Italian Wedding Cookies are also known as Italian Butter Balls.
They are very similar to Mexican Wedding Cookies, except this recipe uses granulated sugar in the cookie dough rather than powdered sugar.
Today’s recipe is a guest post from Erica!
She shares with us today her secrets for success and shortcuts she uses and tells us how to make Italian Wedding Cookies.
Cream together butter, sugar, vanilla extract, and water all at once.
I do this all in one step because I’m usually baking these cookies last minute for different functions, and I’m trying to get things done pretty quickly.
Next, I add flour to the butter and sugar mixture. I add both cups of flour at the same time for speediness.
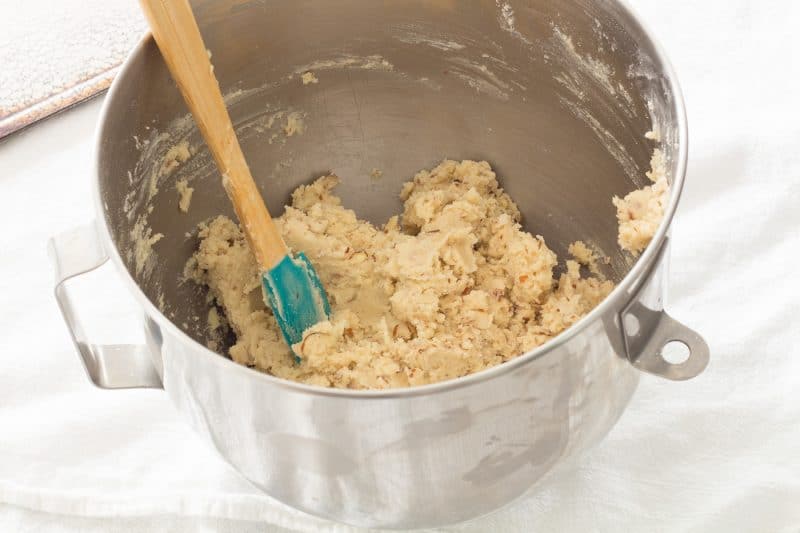
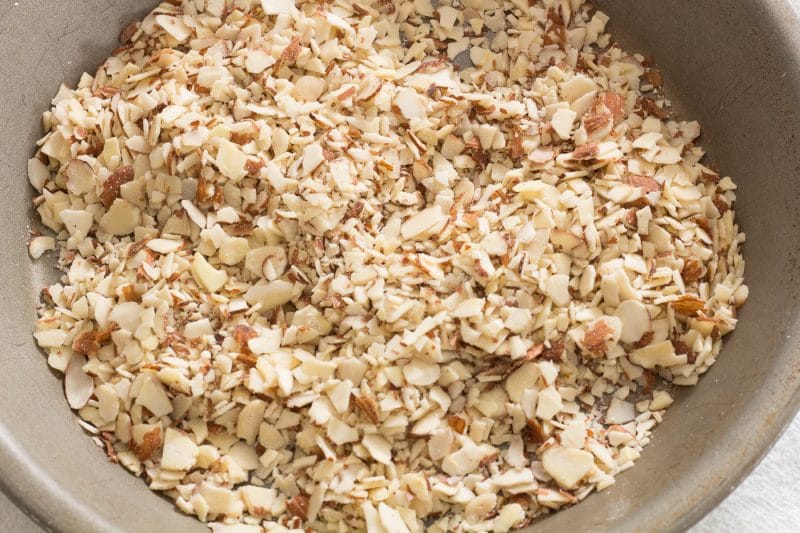
Once the cookie has come together, I add the almonds. I prefer to use sliced almonds, and as I am adding them to the dough, I crushed them with my hands.
I like to be able to see the nuts.
It also leaves some crunch in these otherwise soft and melt-in-your-mouth cookies.
Mix everything together one last time, and voila – you have Italian Wedding Cookie dough!
This next part is the secret to success with this cookie.
The dough must be chilled for a few hours PRIOR to baking them off.
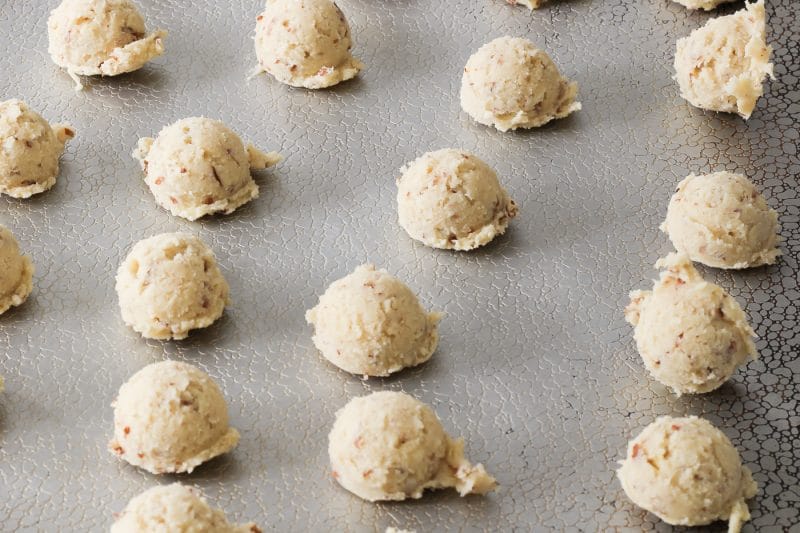
Since I have broken my fair share of cookie scoops trying to scoop out chilled cookie dough, I form my dough balls BEFORE I refrigerate them.
I typically leave the dough in the fridge for 2 to 3 hours, but I’ve been known to leave them overnight, or even a few days (cover them up though, otherwise they will take in any other flavors/smells floating around in there).
When you’re ready to bake, preheat your oven to 325 degrees F, and place your chilled cookie dough on a baking sheet, evenly spaced.
They don’t tend to spread out, so they don’t need a ton of space in between each cookie and bake for 15-20 minutes.
The cookie tops will not brown, but the bottoms will turn a nice honey color.

In general, I bake mine for about 18 minutes, but there will be some time variations with different ovens.
Just don’t cook them until the tops of the cookie balls start to turn brown, they are overbaked by then.
Remove cookies from the baking sheet, and place them on a cooling rack.
I just recently purchased my first cooling rack, so if you don’t have one, no worries, just set them on the counter to cool.
Honestly, you could probably leave them on the baking sheet too, but I only have one, so I pull them off the cookie sheet and continue my baking adventure.
The other secret is when to roll the cookies in powdered sugar. I don’t do that when the cookies are hot or it makes a hot mess!
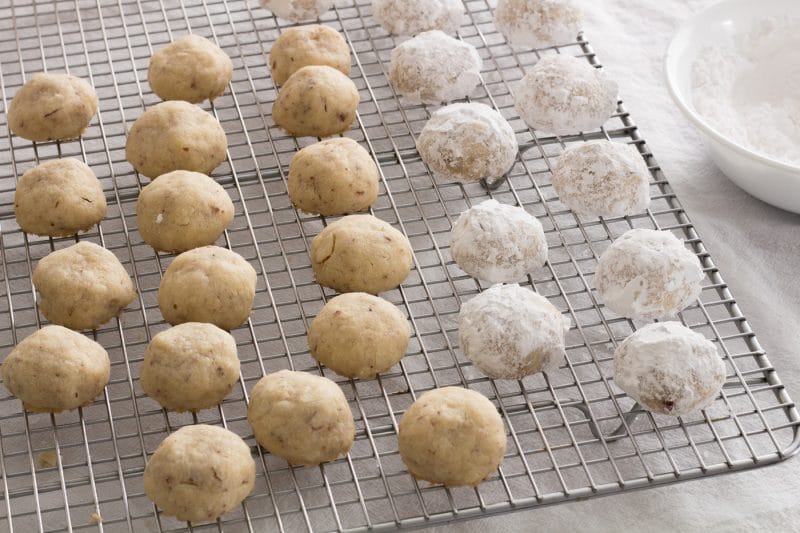
Once the cookies have cooled, roll them around in powdered sugar.
Put them onto a serving plate and get ready to eat more Italian Wedding Cookies than should be allowed!

These cookies can also be shaped into crescents or any other shape you would like.
Just remember to form them into shapes before refrigerating.
More Cookie Recipes from Pear Tree Kitchen:
Pumpkin Cookies with Caramel Frosting
DoubleTree Chocolate Chip Cookies
FOLLOW US ON SOCIAL MEDIA AND SAVE THIS RECIPE
SIGN UP TO RECEIVE NOTIFICATIONS AND NEVER MISS AN UPDATE

Italian Wedding Cookies
Equipment
- Cookie Scoop
Ingredients
- 1 cup salted butter softened
- 1/2 cup granulated sugar
- 2 teaspoons vanilla extract
- 2 teaspoons water
- 2 cups all-purpose flour
- 1 cup sliced almonds crushed by hand
- 1 cup powdered sugar for rolling
Instructions
- In a large mixing bowl cream together butter, granulated sugar, vanilla, and water.
- Add flour, all at once, and mixed until all of the flour has been incorporated.
- Once the dough has come together, crush the almonds with your hands and add to the dough.
- Mix just until the almonds are evenly distributed.
- Roll cookie dough into 1 to 1 ½-inch balls and place onto a cookie sheet.
- Place cookie balls into the refrigerator and allow to chill for at least 2 hours.
- Cookie dough can be left in the refrigerator overnight, but make sure to cover them for any amount of time longer than 3 hours.
- After cookies have been chilled, preheat an oven to 325 Degrees F.
- Bake cookies in preheated oven for 15 to 20 minutes, or until the bottoms of the cookies have turned a honey brown.
- Allow the cookies to sit for 1 minute and the cookie remove to a cooling rack.
- Once cookies have been completely cooled, roll in powdered sugar.
Notes

Nutrition
Nutrition information is automatically calculated and may vary based on exact ingredients used. For accuracy, consult a registered dietitian or nutritionist.
The balls were in fridge 3 hrs. Baked them and flat as pancake???? What went wrong??
Hi Martha!
I’m sorry you had problems with your cookies. Too much butter, or an oven that isn’t running hot enough are the only reasons that come to mind.
Happy Holidays!
I’m curious. Why the need for the water in this recipe? I have seen many versions of this particular Recipe. None of them calls for water.
Hi Yvonne!
It helps bring the dough together. Sometimes when the air is dry, the dough is too crumbly to form into balls. You can try it without water, and if your balls don’t want to come together, just add the water. I suspect my daughter who developed this recipe, doesn’t use additional flavoring like almond, and this serves as a placeholder. Hope this helps!
Great recipe, I had found my mom’s recipe for these cookies, but it was really long so I tried yours and they taste exactly the same.Thanks for a shorter version.
Hi Dee Dee!
I’m happy to hear that liked a shortened version and even better that it tasted like your mom’s!
Thanks for visiting again to let us know.
Cheers!
Can these be made without the almonds? We have a family member with severe nut allergies.
Hi Katherine!
They can made with any kind of nut you prefer and you can even make them without nuts. Hope this helps!
I made these for my daughters baby shower and they were a hit! My husband loved them and he would not eat the cookies from another recipe I made. Thank you so much for the recipe.
Hi Lucia!
I am so happy to hear that your cookies went over so well!
How long would these hold up in an air tight container?
Hi Pamela!
These will be at their best in the first 5 days, they will start to dry out a bit after that. If you need to keep them for longer than a week I would freeze them before coating with powdered sugar. Let them thaw and then roll them in sugar. Hope this helps!
Cheers!
Can these be made with almond flour instead?
Hi Teresa!
I have not personally used almond flour in these cookies but I suspect that the recipe would need some kind of structure for holding together after baking. You might try a blend of almond four and a gluten-free flour blend.
Hope this helps!
These look so good!
Can the dough be frozen and then baked at a later date???
Hi Maria!
Thanks for stopping by!
I don’t know why it couldn’t be frozen and baked later. We have left them in the refrigerator for up to a week before making them!
I would probably thaw them in the refrigerator for a bit before baking though to make sure they are baked al the way through.