
Amazon Associates Disclosure We are a participant in the Amazon Services LLC Associates Program, an affiliate advertising program designed to provide a means for us to earn fees by linking to Amazon.com and affiliated sites.
Pepperoni Pizza Rolls


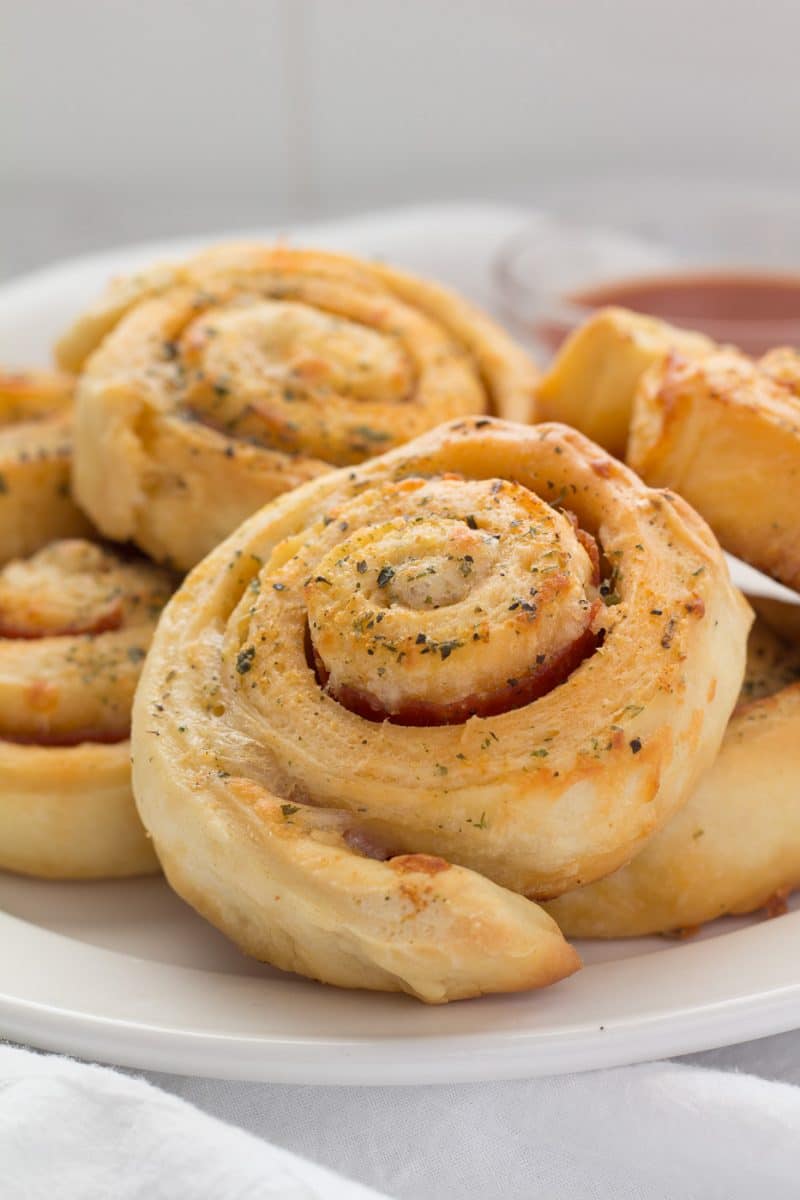
Pepperoni Pizza Rolls are an all-ages family favorite! Perfect pepperoni and mozzarella cheese pinwheels topped with garlic herb butter and delicious seasonings.

Make up a batch and keep them in the freezer for impromptu dinners and unexpected guests!
These are similar to Pepperollies, an annual holiday special at Mazzio’s! This copycat recipe helps curb our cravings year-round.
Pepperoni pizza rolls start with our Versatile Yeast Dough recipe. You can cut the recipe in half for one roll or use the whole recipe for 2 rolls, which is what I do!
I make a full batch of dough for a double batch of Pepperoni Roll-Ups or a single batch of this recipe and with a batch of these Sausage Rolls to vary the flavors!

These pizza rolls only require a few ingredients and most of the prep time is for the dough to rise, so don’t panic! I promise you won’t be trapped in your kitchen for five hours for these tasty treats.
Ingredients
- Pizza dough — homemade or refrigerated
- Pepperoni slices
- Mozzarella cheese
- Melted butter
- Italian seasoning
- Parsley
- Garlic powder
- Marinara sauce, for dipping!
You’ll mix the last four ingredients for a delicious garlic herb butter that I put on the pizza rolls before baking and serve on the side for dipping. If you like ranch dressing, pesto, white sauce, or other alternative sauces on your pizza, feel free to use those for dipping too!
How to Make Pepperoni Pinwheels
First, roll out your dough. You need to cover the whole thing with a layer of pepperoni, leaving about a half-inch of dough uncovered on one long side.

Now, time to roll! Start with your covered long side and roll toward the uncovered side.

The uncovered side of your dough will be used to pinch the pizza rolls together, so you’ll want dough on dough here. If you have to remove a few pepperoni to make it stick, that’s ok!

Pro tip: Don’t roll these up too tight!
You want minimal gaps but some space for the pastry to puff out. If wrapped too tight, the middle of the roll will pop up during the rising time and when it starts baking. If wrapped too loose, they’ll fall apart.
Even after all the rising times, that yeast still has some life left in it!

There is no tomato sauce in these pepperoni pizza rolls! I find the extra moisture too much to keep the pinwheels together.
I serve these with both pizza sauce and melted garlic herb butter on the side for dipping and drizzling. For the butter sauce, use the same recipe for a dipping sauce that we use for making the rolls.
The recipe may look like it has way too much garlic herb butter, but it will be used twice!
The second coating of garlic herb butter gives these a delicious coating of seasonings and a beautiful golden crust!
Most of the butter from the first use will run through Pepperoni Roll-ups flavoring the insides and the excess will bake into the bottom.
How to Reheat Pizza Rolls
These pepperoni pizza rolls can be quickly reheated in the oven for an easy quick meal!
Preheat your oven to 350°F and cover the rolls with aluminum foil to avoid burning the crust. Reheat for about 15 minutes and check the temperature.
Storing Leftovers
After a few hours, these need to be refrigerated or frozen.
These pinwheels will last about 4 days in the fridge or up to 6 months in the freezer. If freezing, separate each roll with parchment paper for easy access later!
Whenever storing leftovers, always be careful if your food has changed colors or smells. If so, let it go and make a new batch!
MORE PIZZA RECIPES YOUR FRIENDS & FAMILY WILL LOVE
FOLLOW US ON SOCIAL MEDIA AND SAVE THIS RECIPE
SIGN UP TO RECEIVE NOTIFICATIONS AND NEVER MISS AN UPDATE

Pepperoni Pizza Rolls
Ingredients
DOUGH
- 2 ¼ teaspoons yeast
- 2 teaspoons sugar white or brown divided
- 1 ¼ cups 115 Degree F water
- 2 tablespoons oil
- 3 cups all-purpose flour
- 1 teaspoon salt
PIZZA ROLLS
- 90 to 100 pepperoni slices
- 1 ½ to 2 cups finely shredded mozzarella cheese
- ½ cup butter melted
- ½ teaspoon Italian seasoning
- ½ tablespoon parsley
- 1 teaspoon garlic powder
Instructions
DOUGH
- Combine yeast, 1 teaspoon of sugar, and water in a small bowl and mix to combine. Set aside.
- Combine flour, salt, and remaining teaspoon of brown sugar in a mixing bowl. Use the dough hook on a stand mixer if available.
- Once the yeast mixture is foamy on the top, add the oil and mix to combine.
- Add the yeast mixture to the flour and mix on medium speed until the dough is smooth and elastic. If not using a mixer, knead the dough by hand until smooth and elastic.
- Set dough aside and allow to rise for at least one hour.
- This dough will develop deeper flavors as it continues to sit. If not using this dough within 2 hours place into the refrigerator and use within 4 days.
- When using this recipe you may have extra dough. Use it to make additional upside pizzas, regular pizza, or cheesy breadsticks.
PIZZA ROLLS
- Prepare baking sheets by spraying with baking spray or covering in parchment paper.
- Preheat oven to 350 degrees F.
- Melt butter.
- Using your hands, rub Italian seasonings and parsley between palms under finely crushed and add to melted butter along with garlic powder and set aside.
- Using half of the dough at a time, roll thinly into a roughly 12 X 18-inch rectangle.
- Cover with pepperoni slices, leaving a ½ inch bare spot on the long end furthest away.
- Sprinkle a very light layer of cheese over the pepperoni.
- Being rolling away from you, pulling gently back towards you as you roll to tighten up the log roll.
- Pinch the dough from the bare end into the outside dough of the log roll.
- Slice into ½-inch slices and place on prepared baking sheets at least 1/2 inch apart.
- Spoon about ¼ teaspoon of garlic butter onto tops of each roll and spread it around. You will not use all of the garlic butter now.
- Place pepperoni roll-ups into a pre-heated oven and cook for 20 to 25 minutes. Removed when outer pepperoni roll-ups beginning to brown.
- Remove from oven.
- While pepperoni-rolls are still hot, use a pastry brush and brush on additional garlic butter.
- Serve warm with marinara, garlic butter, or pizza sauce. Enjoy!
Notes

Nutrition
Nutrition information is automatically calculated and may vary based on exact ingredients used. For accuracy, consult a registered dietitian or nutritionist.