
Amazon Associates Disclosure We are a participant in the Amazon Services LLC Associates Program, an affiliate advertising program designed to provide a means for us to earn fees by linking to Amazon.com and affiliated sites.
Sausage Balls


This one is a timeless Southern favorite – Sausage Balls! These little bites of heaven come together in under 30 minutes, using just three simple ingredients. Yep, you read that right – 3! It’s a must-have appetizer for any holiday gathering or even your lively tailgate parties. You know, the kind that gets everyone talking!

Down South, whipping up a batch of Bisquick Sausage Balls is practically a tradition, but you know what? We’ve added a twist that’s perfect for all you meat and cheese enthusiasts out there. Our recipe keeps the meat factor high, giving those biscuit mixes a run for their money. That’s how we keep ours perfect!
So, whether you’re planning a family get-together or gearing up for a day of tailgating fun, these Sausage Balls are your ultimate savory companions. Stick around for our finger-licking recipe that’ll have you coming back for seconds (and maybe even thirds – we won’t judge!). So, be ready to score big with these meaty marvels!
What Are Sausage Balls Made Of?
There are only 3 ingredients in Sausage Balls. Ground pork sausage, a baking mix such as Bisquick, and shredded cheese.
You can make a 4-ingredient sausage ball by adding some softened cream cheese to the mix.
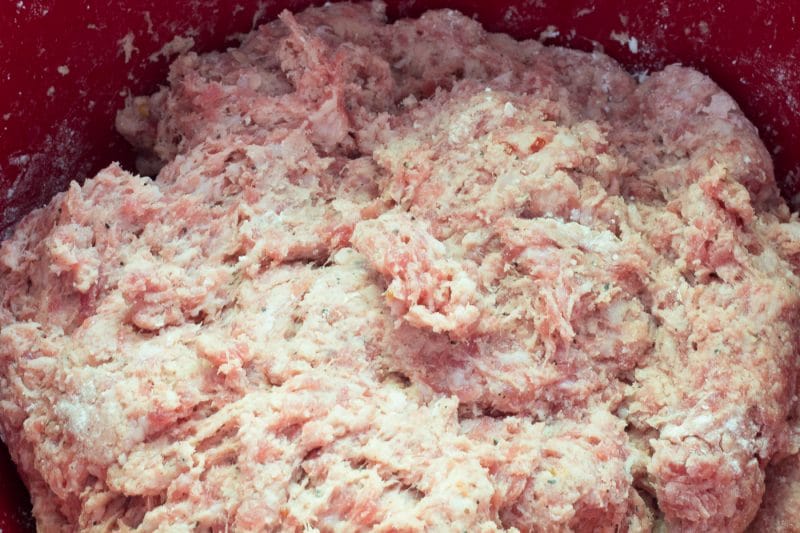
Raw Ground Pork Sausage
Do not cook the sausage. It needs to be raw. Read that twice — the sausage needs to be uncooked. Cooked sausage will not come together easily with the ingredients and will leave pockets of dry ingredients everywhere. Ask me how I know…….
Let the sausage come to room temperature for easier mixing, and it should take at most 15 minutes. I also have better luck with cheaper sausage because of the higher fat content.
Any raw ground sausage can be substituted, including spicy breakfast or Italian sausage!
If I were using Italian sausage, I would change my cheese to mozzarella and serve it with a marinara sauce rather than sour cream.
Turkey sausage doesn’t have a lot of fat; you may find that turkey Sausage Balls are a little on the dry side.
Bisquick and Substitutions
The amount of Bisquick in the recipe is not a mistake! I use way less than other recipes to keep the feel the way we like them.
I skip the milk in this recipe and use just enough baking mix to bind the sausage and cheese together.
Bisquick is my preferred brand, but I have used other brands without issue.
If you want to be little less traditional, use Red Lobster biscuit mix instead. Use the seasoning packet mixed with butter as a dipping sauce.
A gluten-free baking mix is an acceptable substitution, and I suspect no one will notice a difference with all the other flavors.
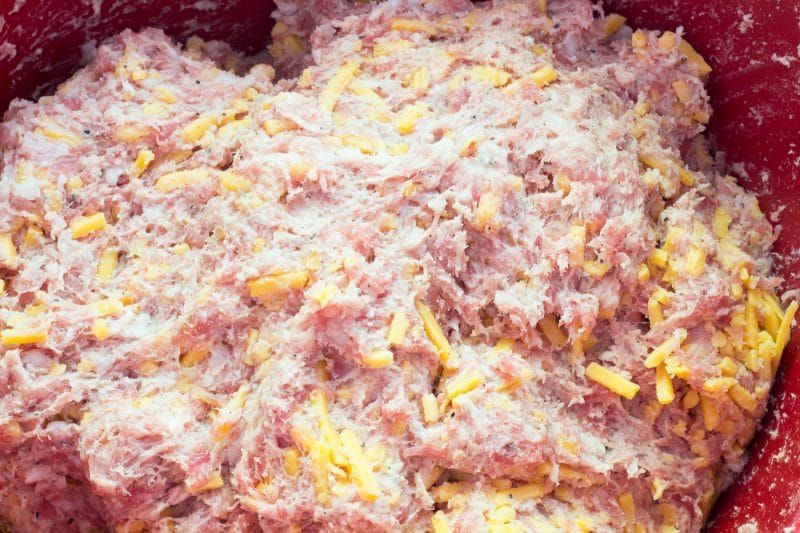
Shredded Cheese
I use pre-shredded cheese. One, it is less work. Two, it holds up better when mixing it. Leave the cheese in the refrigerator until it’s time to use it! Cold cheese will hold its shape during baking, while warmer cheese will melt into the sausage.
You can use any firm cheese; pepper jack cheese would be great mixed with spicy sausage. Just keep the heat level in mind if there will be kids eating these.
You can also leave out the cheese. I have made these without cheese, and they are still good. But, cheese makes everything better!
How to Make Sausage Balls
Make sure your sausage is at room temperature before you start, but don’t leave it out overnight! It shouldn’t take more than 15 minutes.
Preheat your oven and start mixing and forming your balls while the oven comes to temperature.

Mix your sausage and baking mix until it is completely incorporated. It’s hard to believe your eyes when the Bisquick disappears into the sausage!
Once combined, add the cheese and mix it throughout your raw sausage.
Roll the sausage mixture into 1-inch balls and place onto a parchment covered baking sheet with sides to catch the drippings as the sausage cooks! If you don’t have any parchment paper, liberally spray your baking pan with a non-stick spray! These will stick.
Place into a preheated 375 Degree F oven and bake for 20 minutes. Remove from the oven allow the balls to rest before serving or storing.
Cream Cheese Sausage Balls
You can easily make Sausage Balls with cream cheese by adding up to 8 ounces of softened cream cheese for an even better sausage ball! Mix well with the sausage before adding Bisquick. There is no need to change the amount of the other ingredients.
Baking temperature and times will be the same.
Best Way to Mix the Dough
For a rustic-looking ball with all the lumps and bumps you might remember from childhood, get at it with impeccably clean hands! Hand mixing will also give you a more tender sausage ball.
For hands-free mixing, a dough hook on a stand mixer works great and is quick, but the balls will have a smoother texture. They may also be tough. If you decide to use the mixer, use a low speed and don’t overmix.
I add my cheese at the very end of the mixing. Waiting until the end allows more cheese to stay together, leaving nice cheesy pockets in the cooked Sausage Balls.

Forming Into Balls
It is easiest to make all the Sausage Balls the same by using my medium number 40 cookie scoop and then splitting that in half.
Don’t split the mixture in half if you want larger Sausage Balls. Just make sure you cook the larger balls until the centers are 165 degrees F!
Why Are Sausage Balls Dry?
Sausage balls will be dry if there’s too much baking mix. Try adding some milk or reduce the amount of Bisquick.
If you used our Sausage Balls recipe and they are dry, you might have pockets of dry ingredients that need to be mixed in better. You need to get your hands in there and mix it all up.
Why Are My Sausage Balls Tough?
There are a couple of reasons why your Sausage Balls can be tough.
The first is overmixing. Sausage Balls are just like meatloaf and meatballs when handling the raw mixture. The more you mess with it, the denser it will become. It has to do with protein structure.
The second reason is you may have overbaked them. The longer you bake Sausage Balls, the more fat they release, especially in a recipe with less Bisquick.
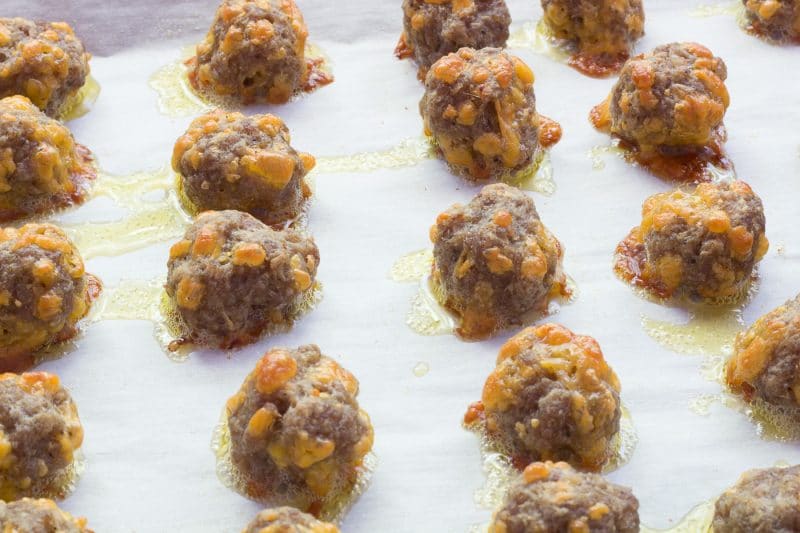
Brown Bottoms
The bottom of the sausage ball will be a little darker than the top, no matter where you put the baking sheet in the oven. The cheese may even ooze out and brown on the bottom. Once the cheese has set, you can easily break it off.
If you have burnt bottoms, the oven temperature may be set too high, or the pan may be too close to the heating element. Grab a sharp paring knife and cut off the burnt bottoms. It isn’t going to look perfect, but you’re not wasting an entire batch!

Make Without Bisquick or Baking Mix
If you find yourself without any baking mix, don’t fret! You can still make these. Substitute 1 1/2 cups of flour and one teaspoon of baking soda for the baking mix.
You can skip these substitutions altogether if you don’t want to use any of these and keep it gluten-free. You’ll have some tasty sausage and cheese balls, but they will be denser and tougher.
Gluten-Free Sausage Balls
You can use gluten-free baking mixes if you need gluten-free Sausage Balls.
You could also substitute it with 1 1/2 cups of Rice Chex crumbs. I process Rice Chex cereal into a fine crumb and use it as a substitute in my meatballs whenever I need a gluten-free filler.
Rice Chex is cheaper than gluten-free bread crumbs, flour, and baking mixes!

How to Serve
You can serve these plain or with your favorite dipping sauce. Maple syrup as a dipping sauce is perfect for breakfast or brunch! Frito Lay makes an excellent cheddar cheese dip that would pair nicely with these.
Sour cream is always good, especially if you have used a hot sausage or added cayenne pepper for heat. I add a tiny bit of water to make it thinner.
Want even more heat? No problem! Add some sriracha sauce to your sour cream like we do our Bacon Wrapped Baby Potato Bites.
I have served with ranch dressing, honey mustard, plain mustard, and mustard mixed with mayonnaise for a “creamy” mustard dip. Grape jelly mixed with chili sauce would also be great to serve on the side.
The possibilities are limitless. I have to admit, I prefer mine plain.
How to Store Leftover Sausage Balls
Leftovers can be refrigerated for up to 4 days — if they even last that long. Ours never do!
Just pop the Sausage Balls into the microwave for 15 to 30 seconds, and they will be almost as fresh as the day you made them.
If you are tailgating, wrap these in foil and put them into the cooler. Throw the foil packet onto the grill for a few minutes, turning often until heated through.
This recipe can easily be doubled, tripled, and quadrupled, making it perfect for crowd cooking and party planning!
Can I Make These Ahead of Time?
Yes! There are two ways to make them in advance.
The balls can be prepared in advance, stashed in the refrigerator for up to 3 days, and cooked just before your company arrives so you can serve them hot. They can also be stored in the freezer.
You can bake them and place them into the refrigerator for up to 4 days or freezer for up to 3 months, and reheat them as needed.
Freezing Sausage Balls
Sausage Balls can be frozen after baking or before
Cooked Sausage Balls placed into an airtight container can be stored in the freezer for up to 3 months. They can be microwaved or re-baked until hot. They don’t have to be thawed first.
Uncooked Sausage Balls can also be frozen for up to 3 months. These need to be flash-frozen first. Place the Sausage Balls, leaving space between them, on a baking pan, or plate that will fit in your freezer—once frozen solid, remove from the freezer and place them into an airtight container and store for up to 3 months.
These do not need to be thawed before baking, but you’ll need to add 3 to 5 extra minutes in the oven. Make sure that the centers are 165 Degrees F.
MORE APPETIZER RECIPES YOU’RE GOING TO LOVE!

FOLLOW US ON SOCIAL MEDIA AND SAVE THIS RECIPE
SIGN UP TO RECEIVE NOTIFICATIONS AND NEVER MISS ANOTHER POST

Bisquick Sausage Balls
Ingredients
- 2 pounds ground breakfast sausage mild or hot, room temperature
- 1 ½ cups Bisquick or another baking mix
- 3 cups shredded cheddar cheese mild, medium, or sharp
Instructions
- If sausage is not room temperature, allow it to come to room temperature before beginning.
- Preheat oven to 375 degrees F.
- Line a baking sheet with sides with parchment paper and set aside.
- Add the sausage and baking mix to a large bowl and mix until all baking mix has been incorporated.
- Add cheese and mix well.
- Form into 1 inch balls.
- Place onto a parchment lined baking sheet. The baking sheet needs sides to keep grease from spilling onto the oven floor.
- Place the baking sheet into 375-degree F oven and bake for 15 to 20 minutes or until lightly browned.
- Remove from oven, allow to cool for a few minutes and serve.
Notes

Nutrition
Nutrition information is automatically calculated and may vary based on exact ingredients used. For accuracy, consult a registered dietitian or nutritionist.
This recipe was written and tested by a human.
Editor: Oliver Baysinger
These sausage balls are *excellent*! I used spicy sausage. So yummy, and so simple and quick to make!
Thanks for visiting again and leaving a review!
Can I prep everything and keep it in the fridge for a few days before baking?
Hi Kansas!
You can stash them in the fridge for up to 3 days, you can even freeze them raw in the freezer for up to 3 months!
They came out very hard and tasteless. I used premium pork sausage and very good cheddar. The family would not eat them. I had to throw them away. Never again.
Oh my goodness! Sorry to hear you didn’t have a good experience with this recipe. Your experience doesn’t seem to be the same as mine or the others who have left comments. There are only a few ways this recipe could produce hard inedible sausage balls. Overmixing, overbaking, using too much Bisquick, or a really hot oven. I’d love to help you figure out where it all went wrong.
I made these sausage balls for my family and they love them.they are easy to make and an easy breakfast.Thank you for the recipe!
Hi Sandra!
Thanks for stopping in again and letting me know! I’m happy to hear your family liked them!
Beth –
Fantastic recipe! We are going to reheat our frozen sausage balls for our sons who are home from school. Do you let the balls defrost before reheating or reheat from frozen?
Thanks!
Aza
Hi Aza!
I have reheated them from both frozen and defrosted. I usually just pop them in the microwave but they can be reheated using the oven. The frozen ones may take a few minutes more. Hope this helps!
I’ve been making these for years and have found the secret to avoid that hard, too brown bottom- bake it a glass dish instead of a metal pan. I just use a regular casserole dish and flip them halfway through. I used to use a baking sheet but even when I turned them halfway through baking they’d still get too done on one side. A glass dish allows them to bake without also “frying” the side that is down.
Hi Jaye!
Thanks for sharing that helpful tip! I will give that a try next time I make these.
Cheers!
I took these to Bunco and everyone loved them! Got lots of request for recipe.
Definitely a keeper,
Maria
Hi Maria!
I’m glad your Bunco group loved them!
Happy Holidays!
Great recipe. I have to double the recipe or I won’t have any leftovers.
Hi Larry!
I have the same problem, and it is the one thing people want to take home with them too!
Thanks for stopping back by!
Be safe!
Excellent recipe. I have made sausage balls before with a different recipe and they were dry. Yours are moist. Thanks
Hi Marsha!
Thanks for swinging back through to leave such a nice review.
Have a Happy New Year!
By FAR the best sausage ball recipe around! Thank you!
Hi Kacie!
I’m so glad you like them this way!
Cheers!
I would like to find out how to make the sausage balls without cheese. I’m lactose intolerant, so I will be using Lactaid milk if necessary.
Hi Liz!
Just omit the cheese.
Cheers!
I shredd my cheese. Try 2 cups of shredded cheddar and 1 cup of gouda or mozzarella. It goes to a whole other level.
Hi Kitty!
That sounds like it makes an amazing sausage cheese ball! Thanks for sharing.
Cheers!
Liz, I have found a couple of cheeses that are lactose free. Cabot cheese is labeled as “naturally lactose free” and doesn’t give me any problems. Another alternative is if your grocery store carries Boar’s Head deli products. Boar’s Head makes a Vermont Cheddar that is lactose free (it is on the label) in both white and yellow.
Hi Tracy!
Thanks for sharing that information!
Cheers!
I make these all the time. I usually don’t even follow a recipe. I like to serve them with Either 1-1/12 cups raspberry jelly or orange marmalade simmered on the stove with about 1 Tblsp. of good mustard. Simmer it until the mustard is incorporated & it is a nice smooth sauce. So yummy!
Hi Shauna!
Your sauce sounds amazing! I might give one or both versions a try for New Year’s Eve!
Beth
Hi Shauna. What kind of mustard? Dijon, yellow, spicy brown? I would love to try this. Thanks.
Turned out perfect. Not dry like other recipes I’ve used in the past. I will make these again. Thank you.
Hi Stephanie!
Thanks for stopping by and letting us know that the recipe was a success! Love it!
Cheers
Your recipe Is real good because they do not taste floury like some I have ate. You get the sausage flavor insead. Thanks for sharing this with us.
Hi Linda!
Thanks for putting a smile on my face today! I am so glad you like the recipe!
Happy Saturday!